Unattended Installations
Brief Instructions on how to create a Windows unattended disk that allow you to:
- Put in the disk
- Boot from disk
- Make some coffee
- Come back and OS is installed
Important:
If you make an Unattended disk for 32-bit, and your physical PC where you are installing WAIK on is 64-bit then you cannot make a disk for 32-bit. You can however use something like Oracle VM Virtualbox and install Windows 32-bit virtually.
Windows 7 - 10
- Install WAIK: (Remember to use the WAIK relevant to your OS version)
- Copy Windows onto the local harddrive
- Open Windows System Image Manager
- File > Select Windows Image > Browse to location of copied OS
- Select the desired Image
- Generate the catalog
- File > New Answer File
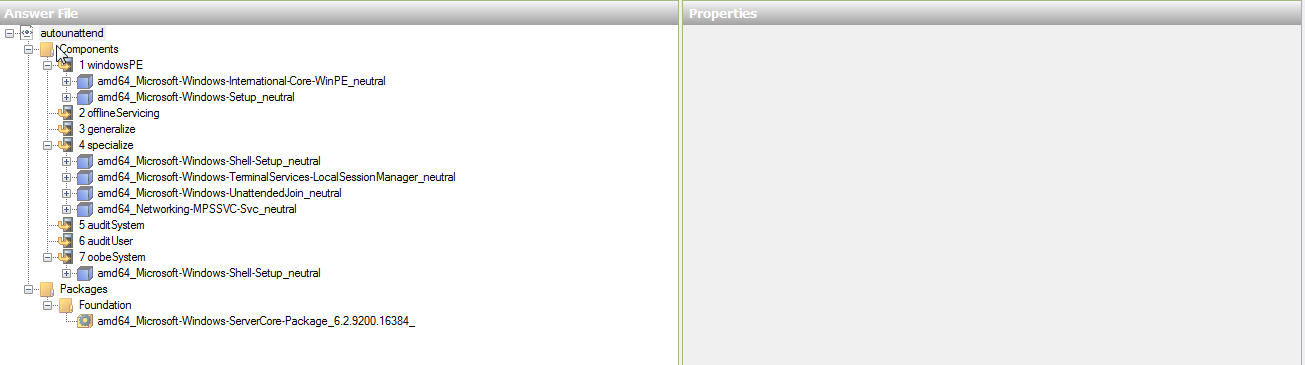
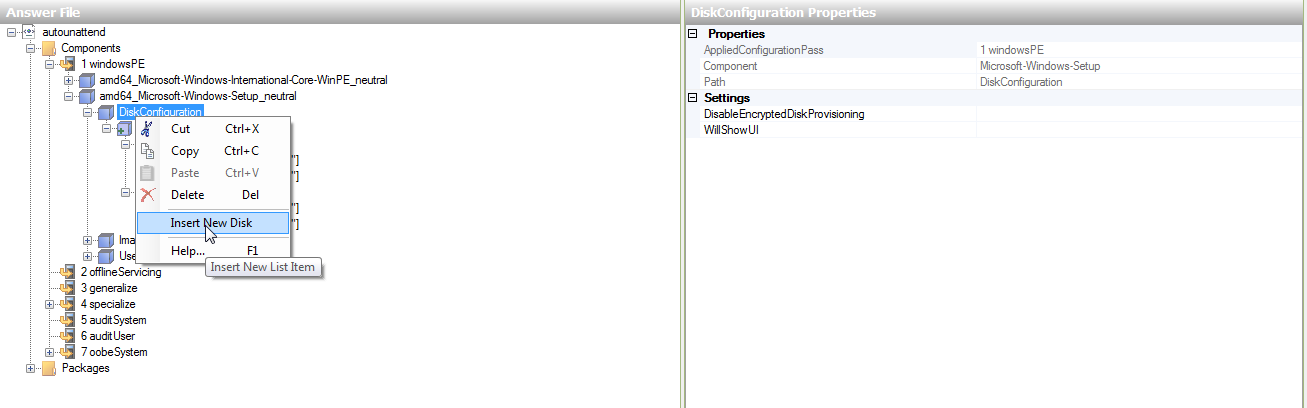
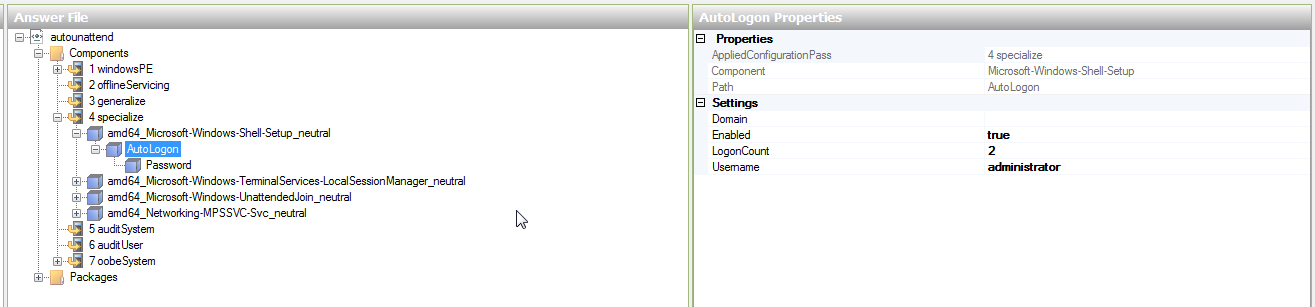
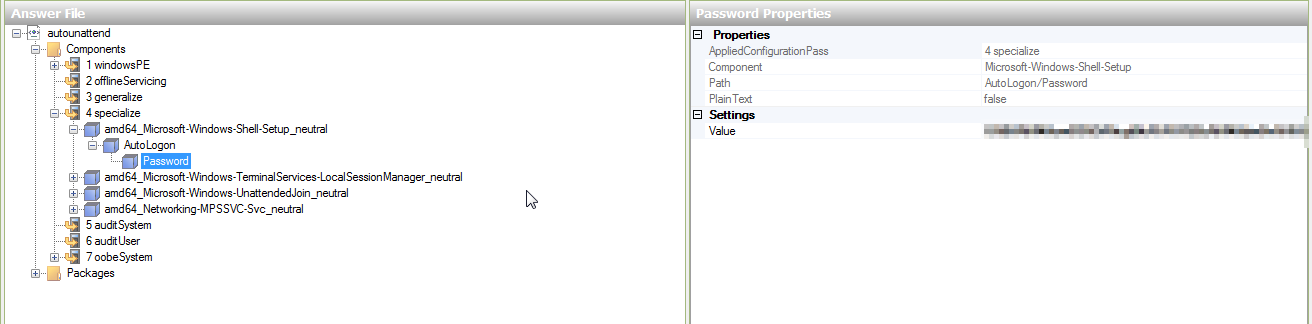
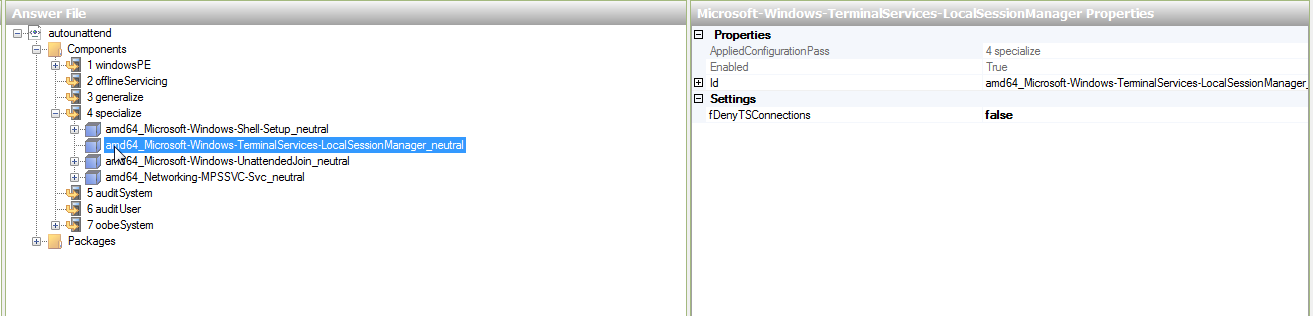
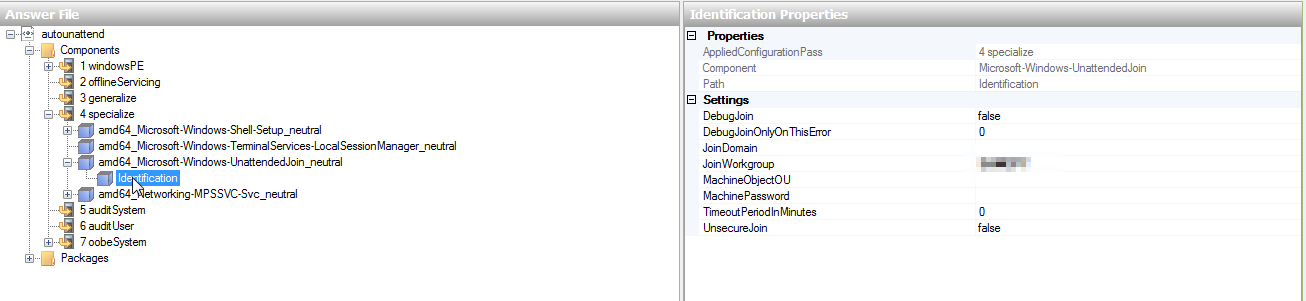
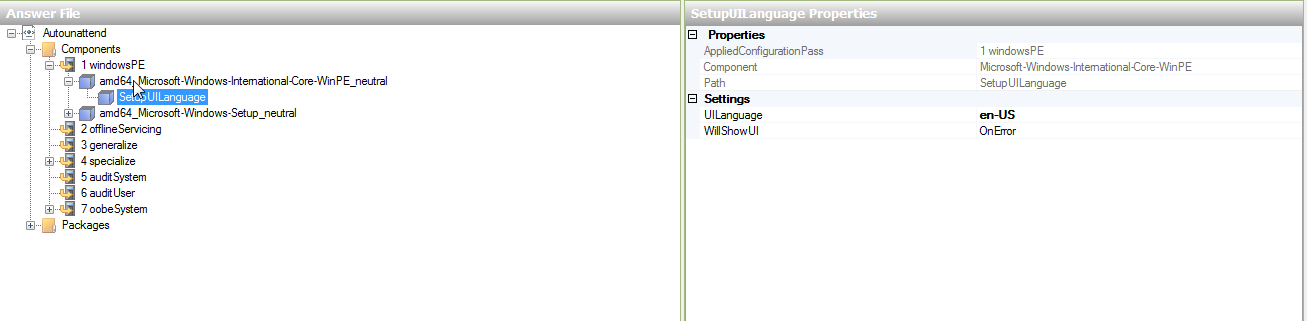
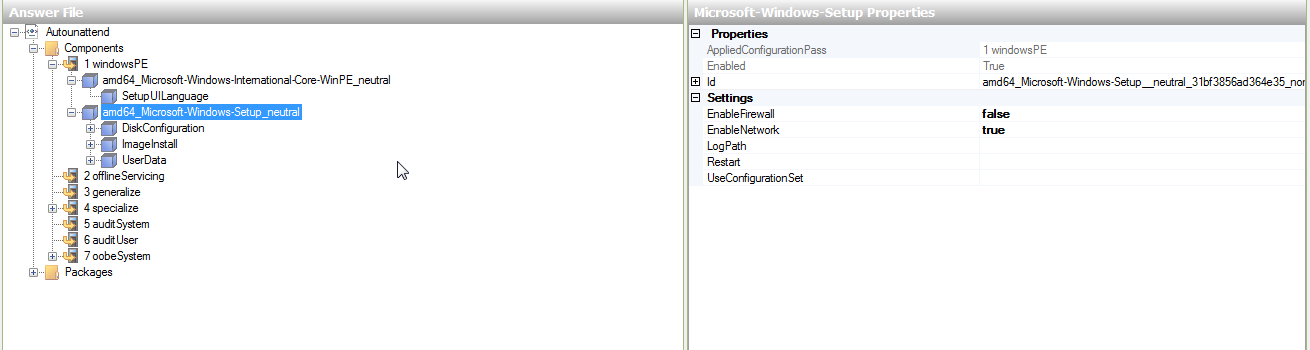
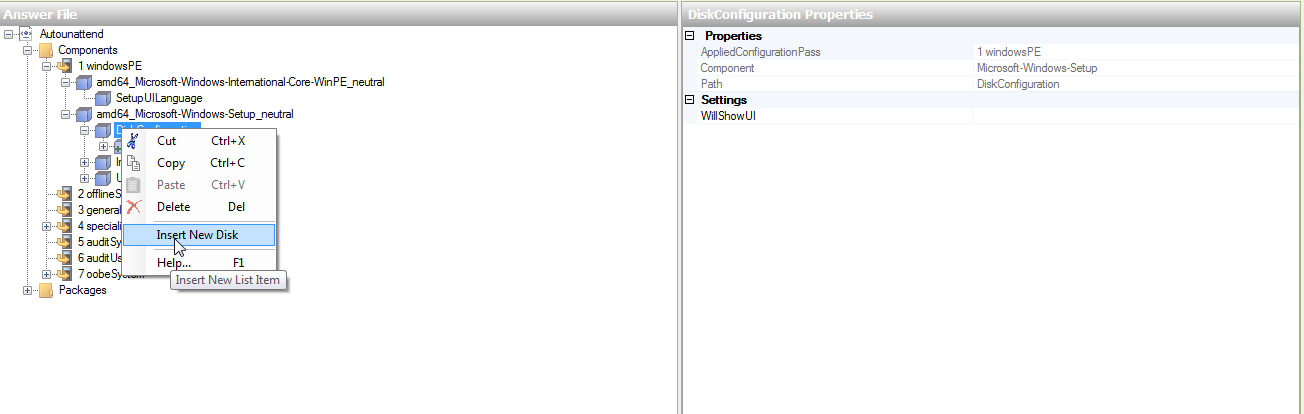
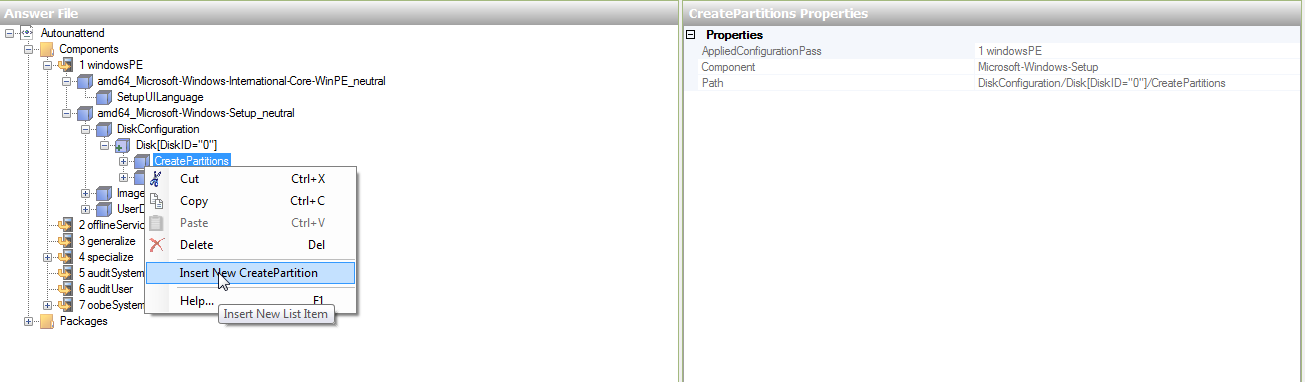
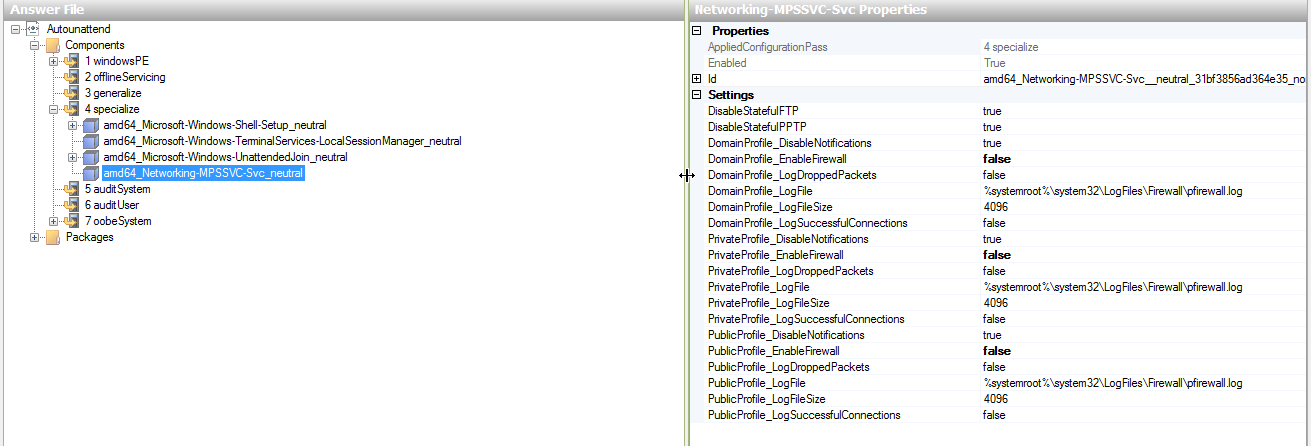
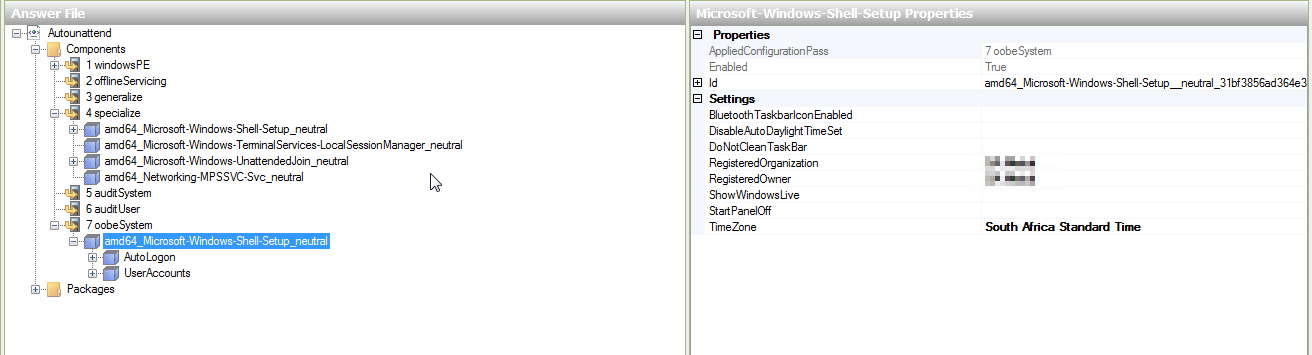
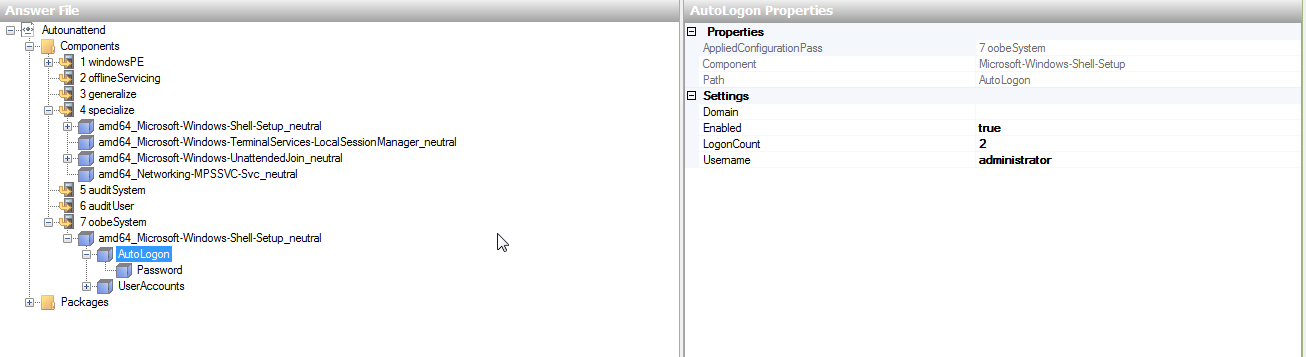
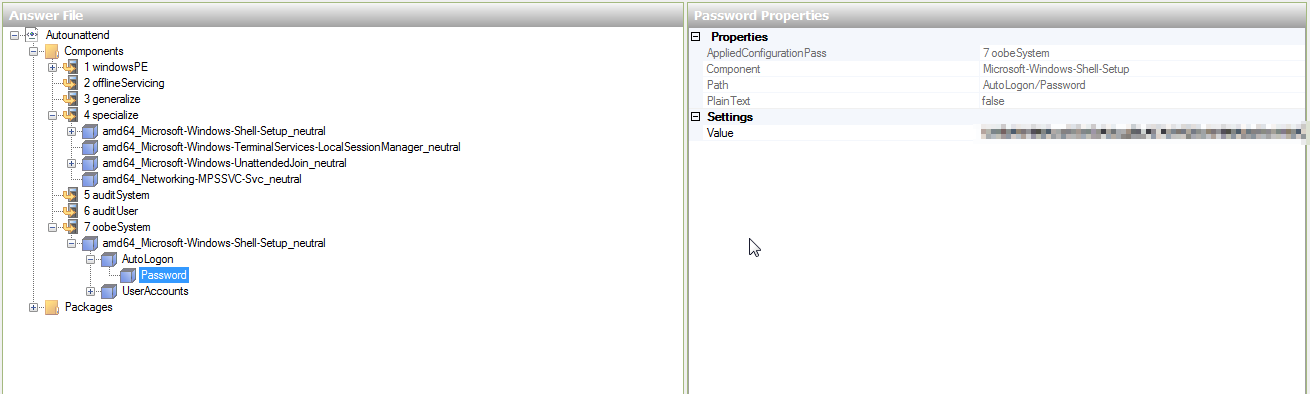
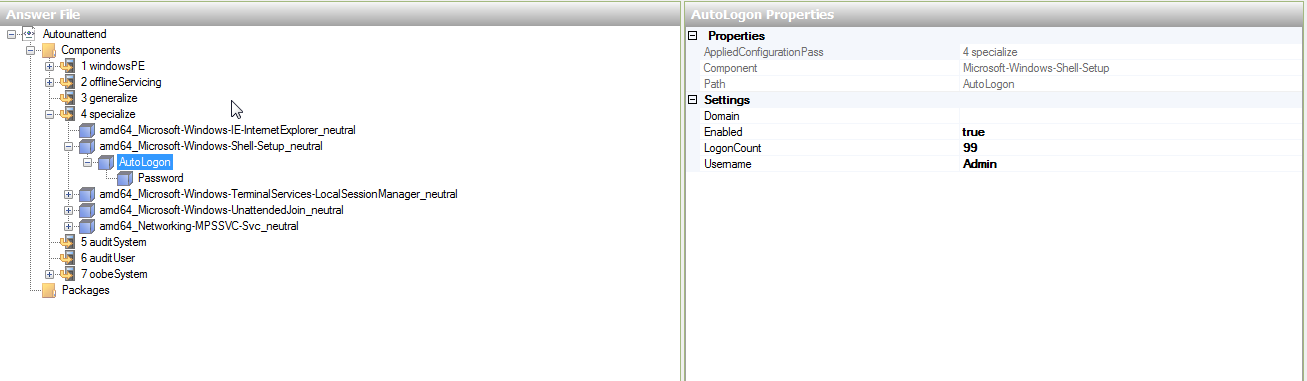
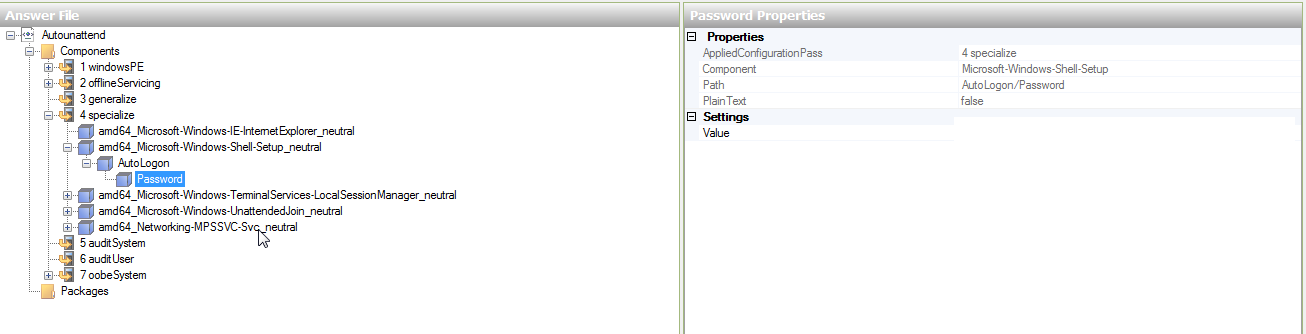
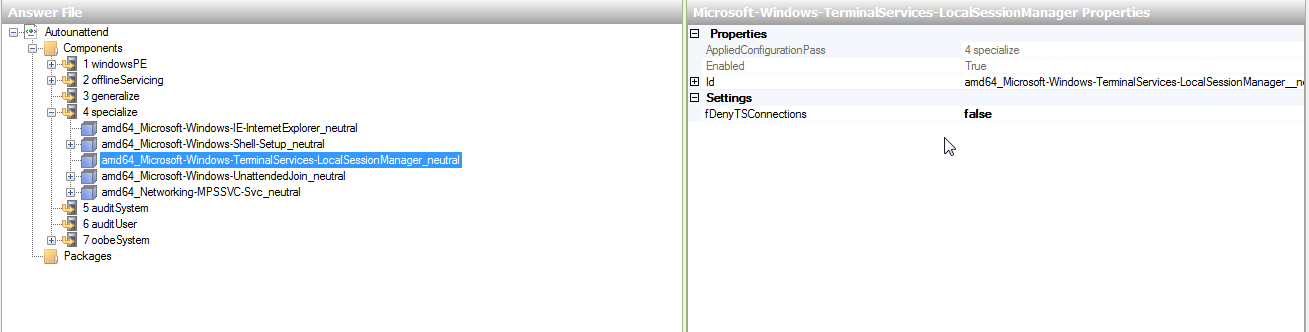
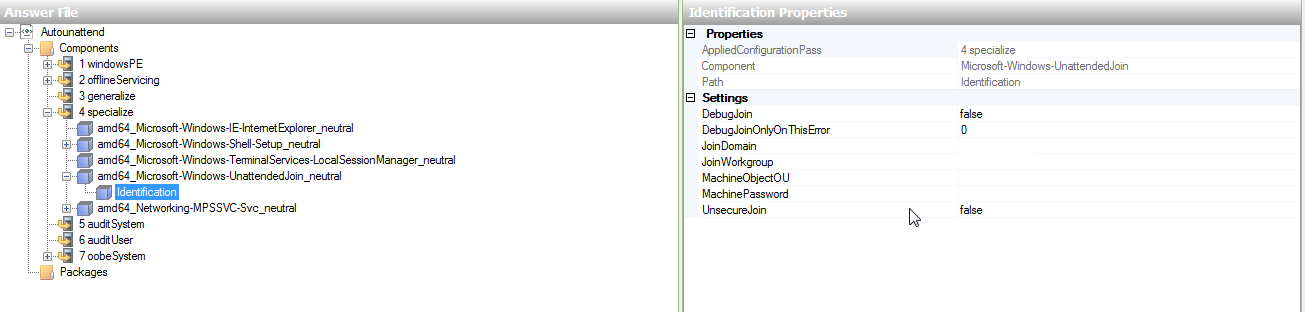
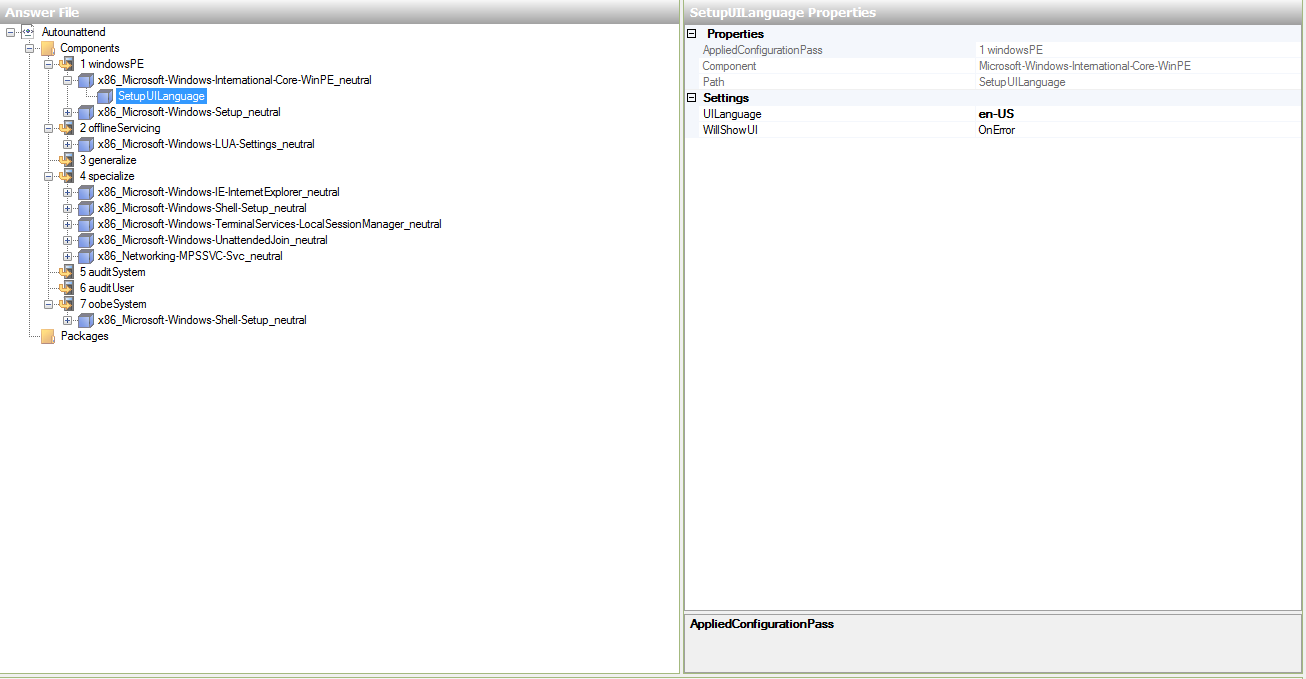
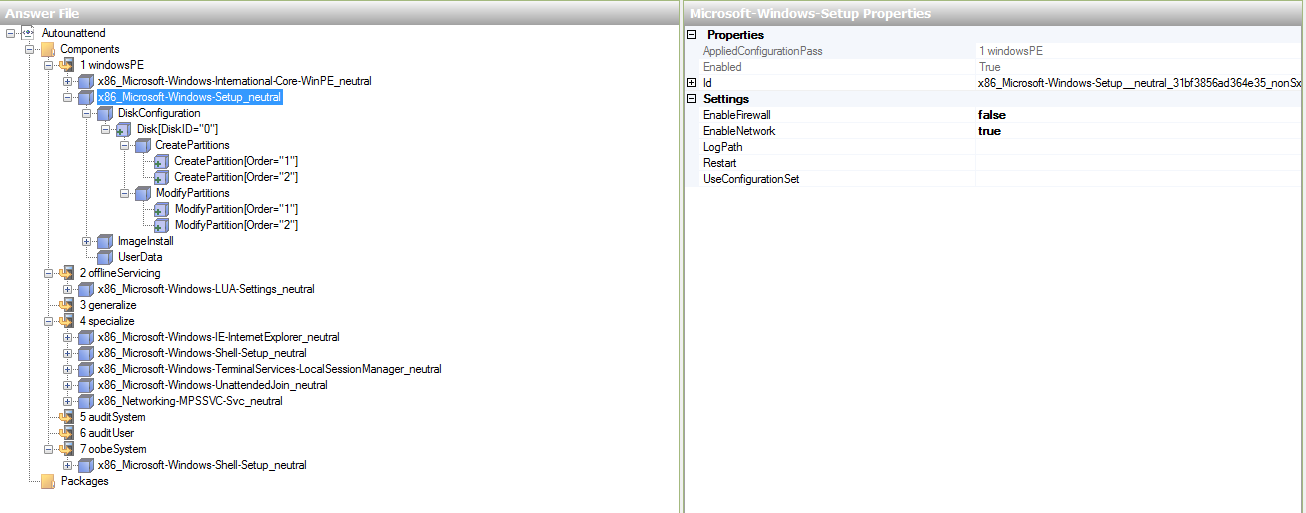
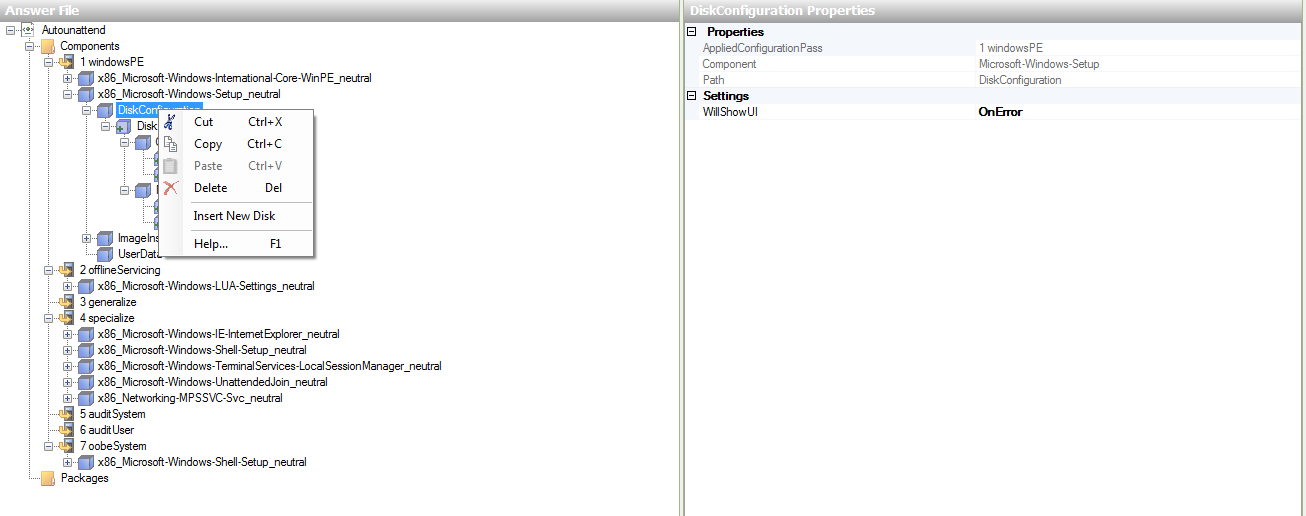
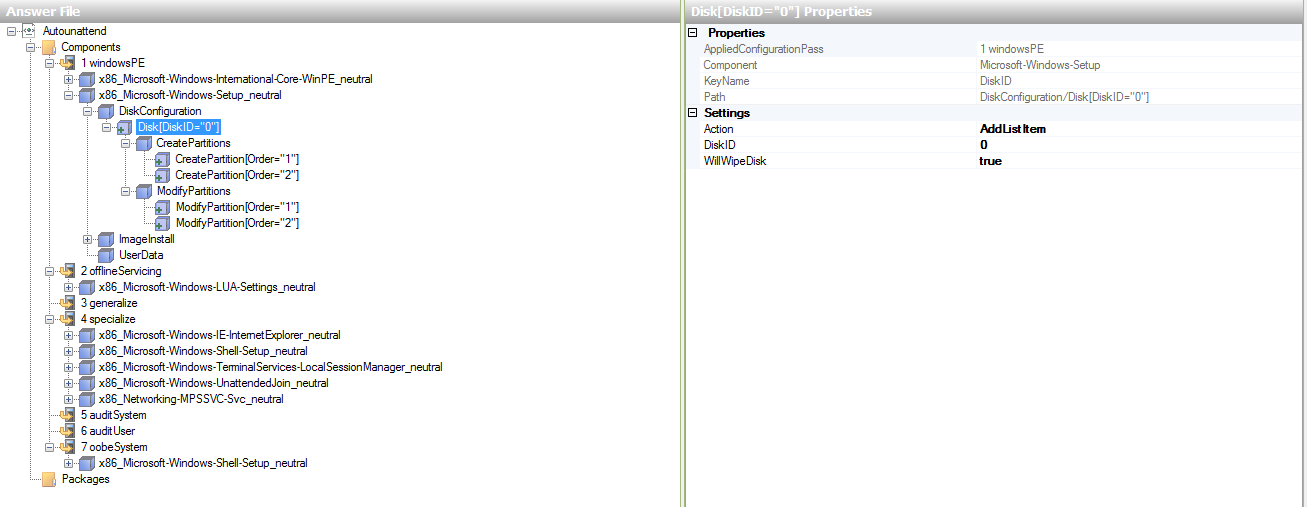
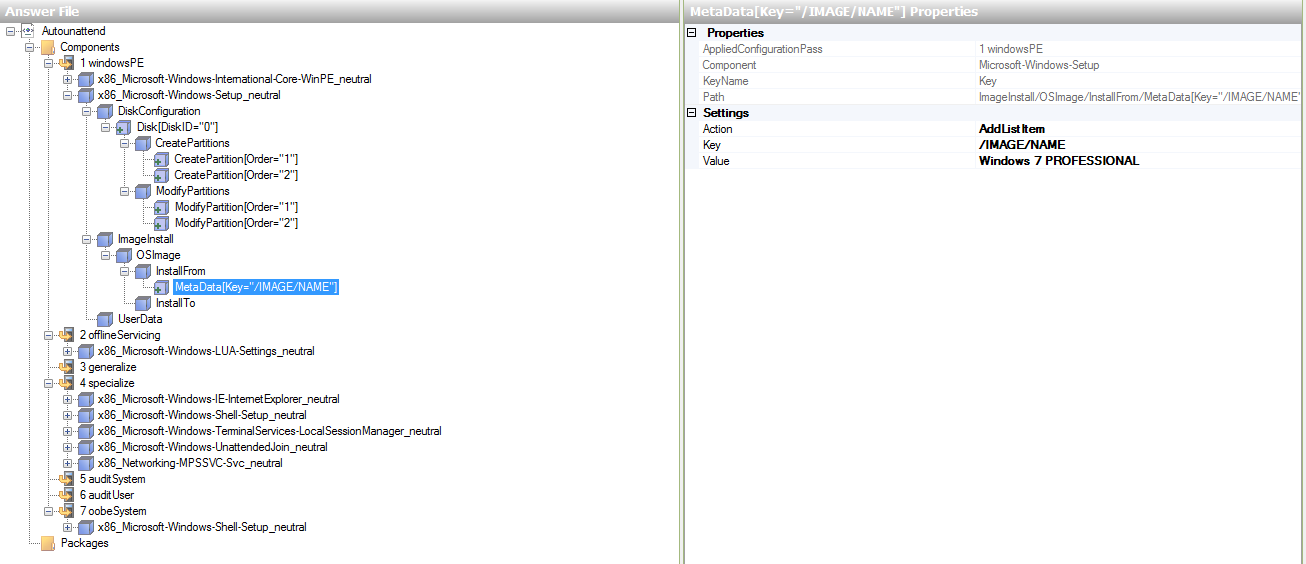
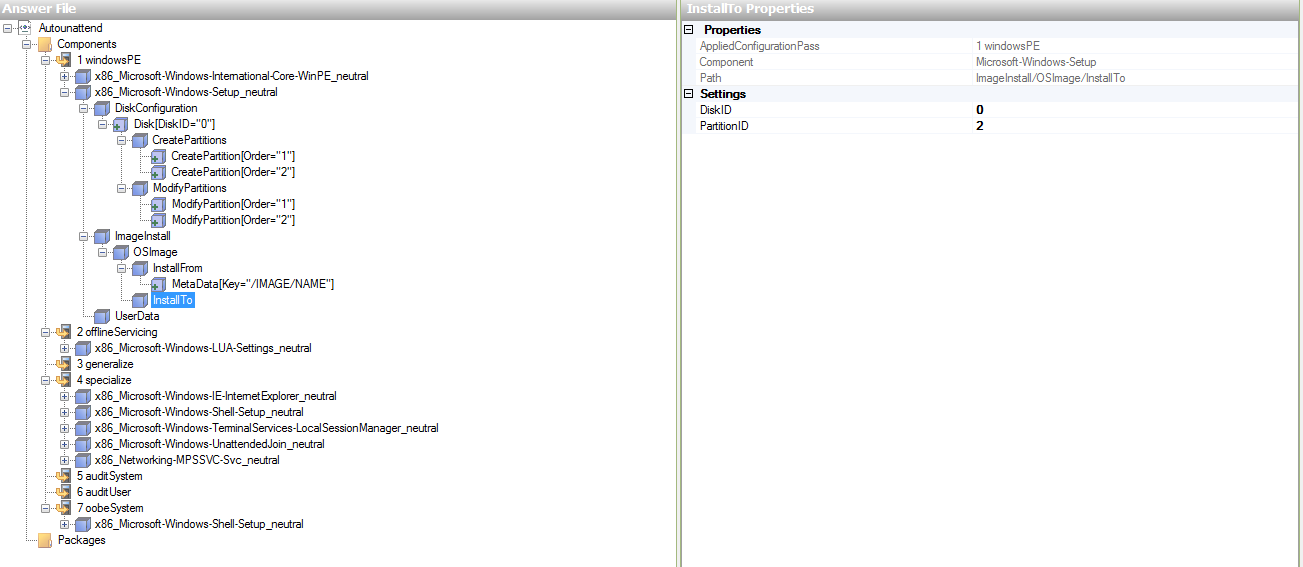
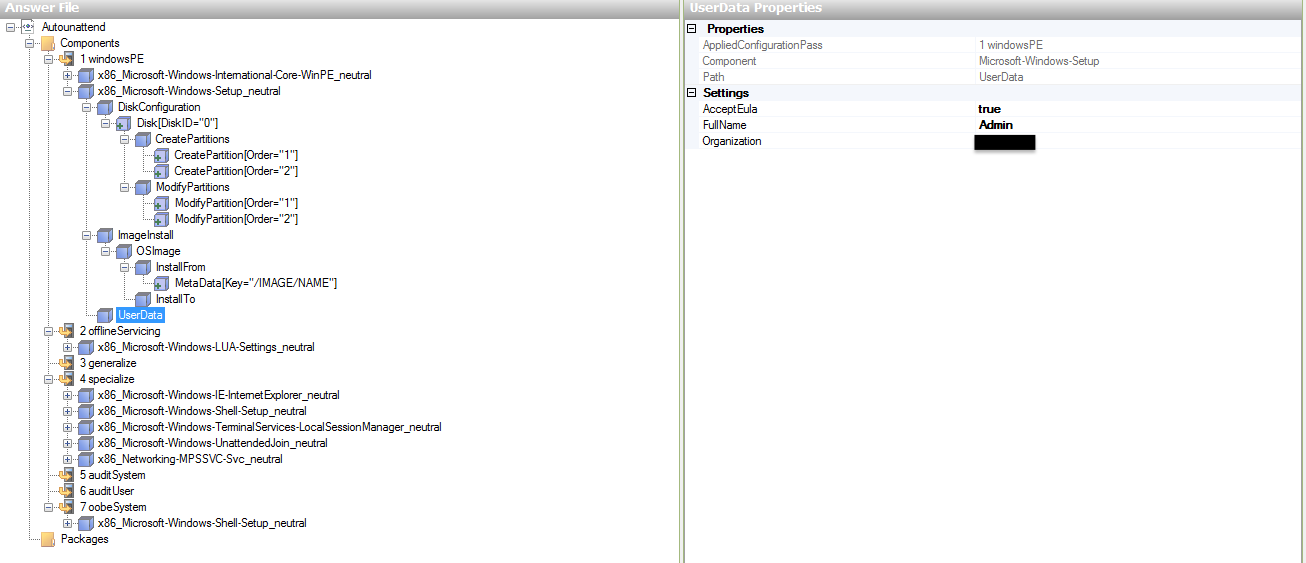
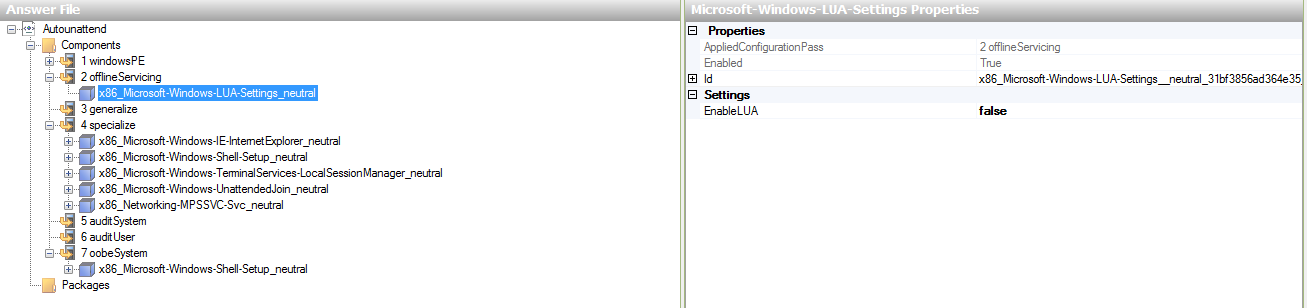
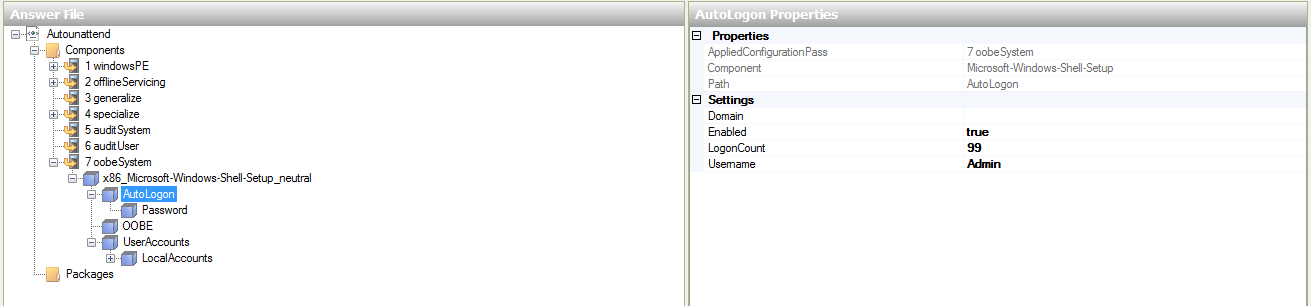
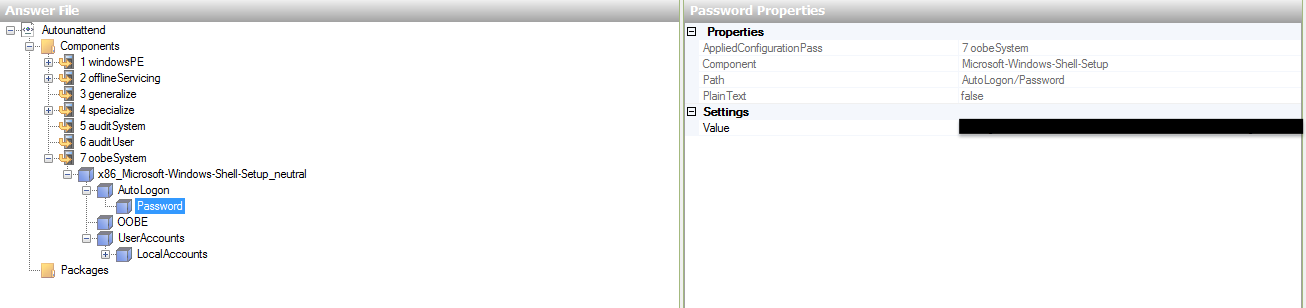
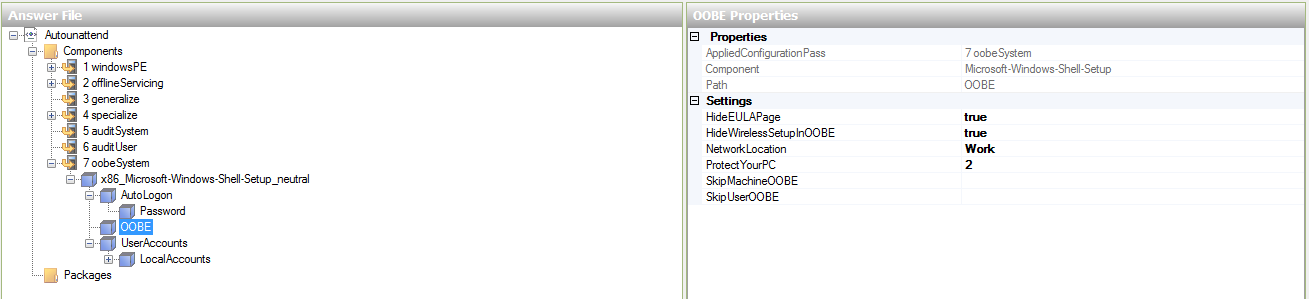
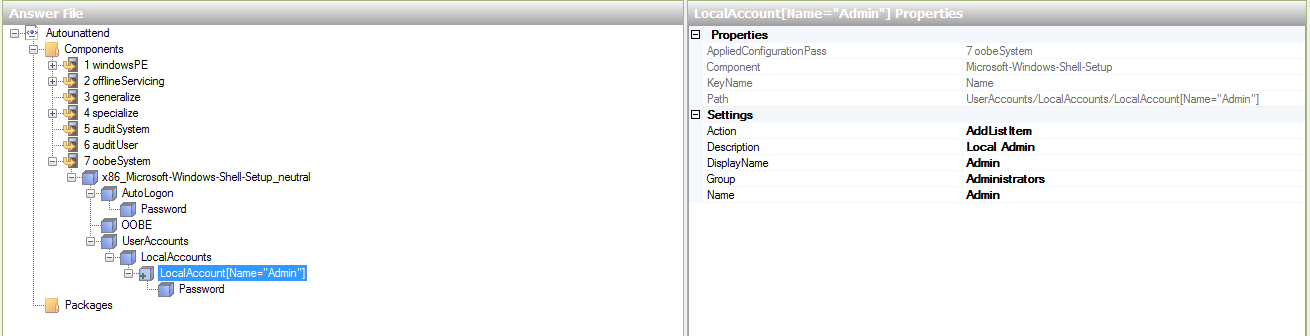
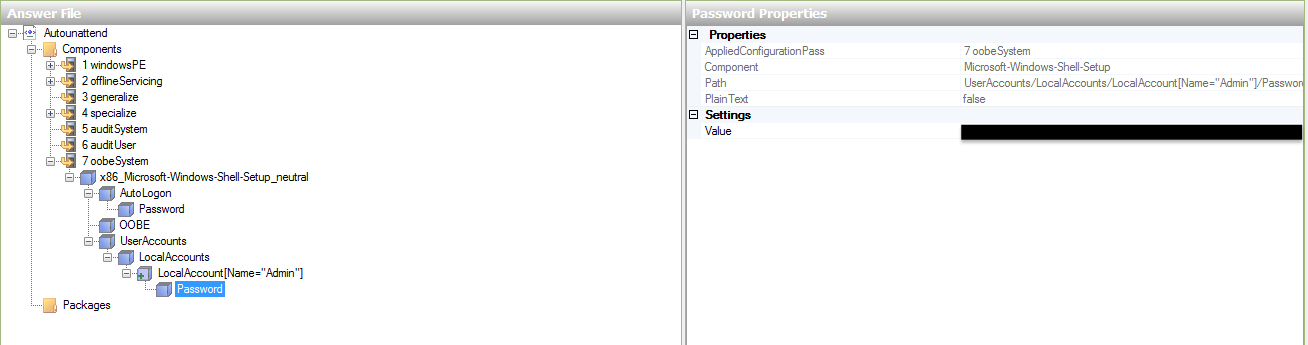
- Click the plus by Components
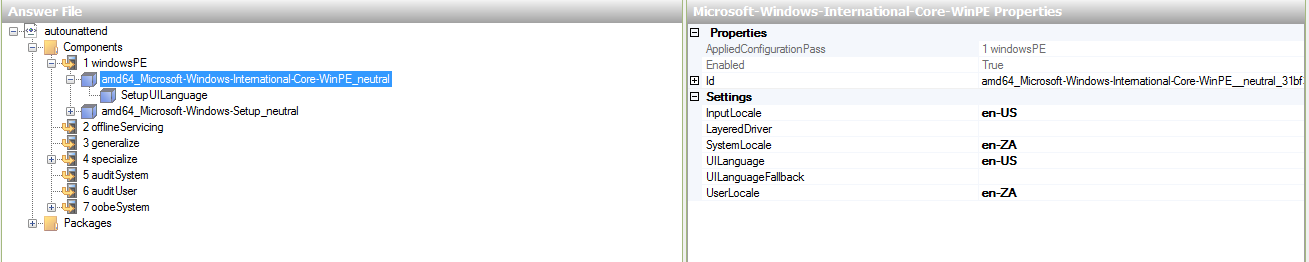
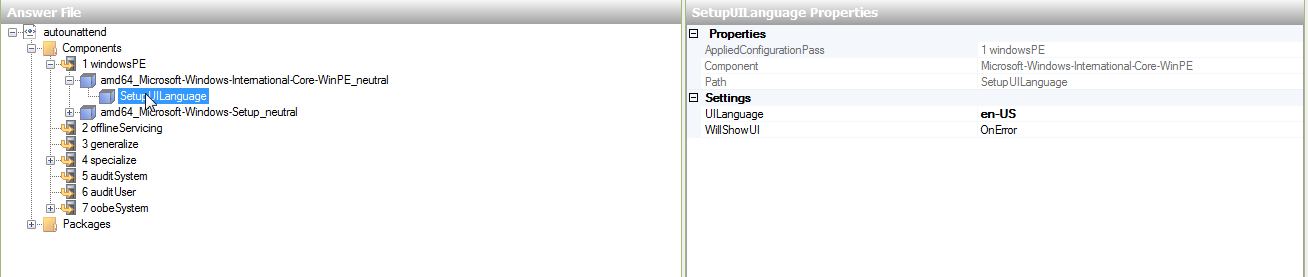
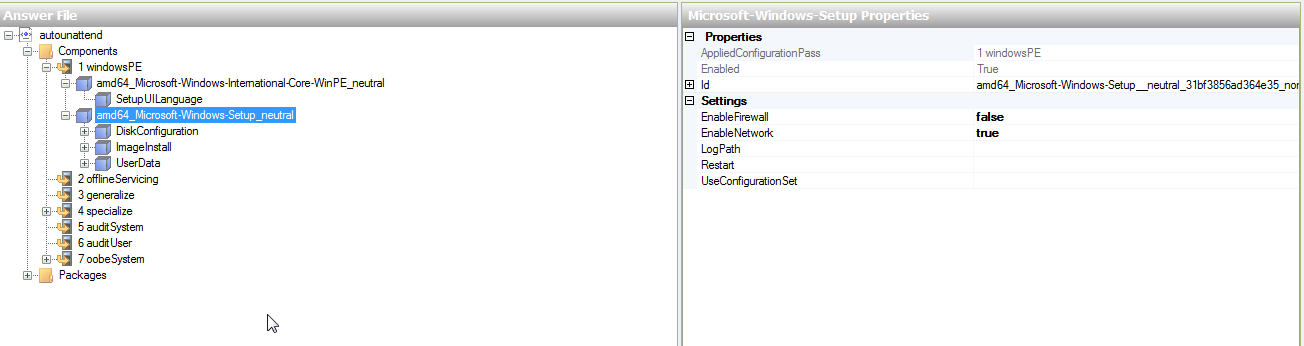
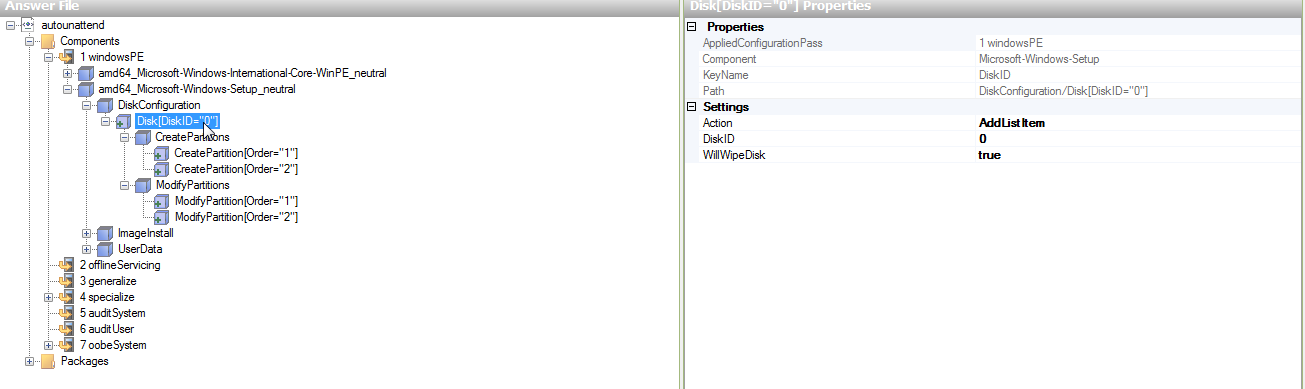
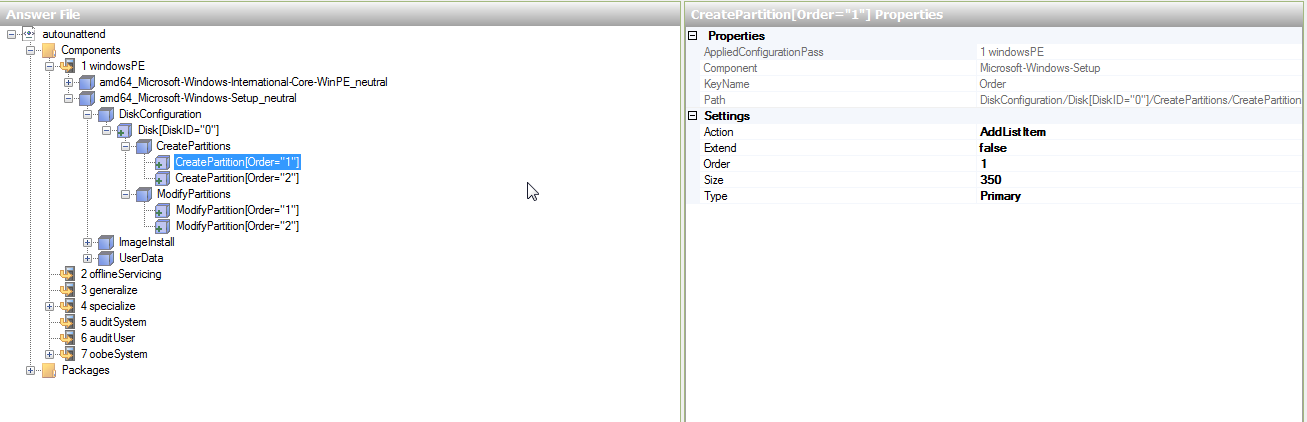
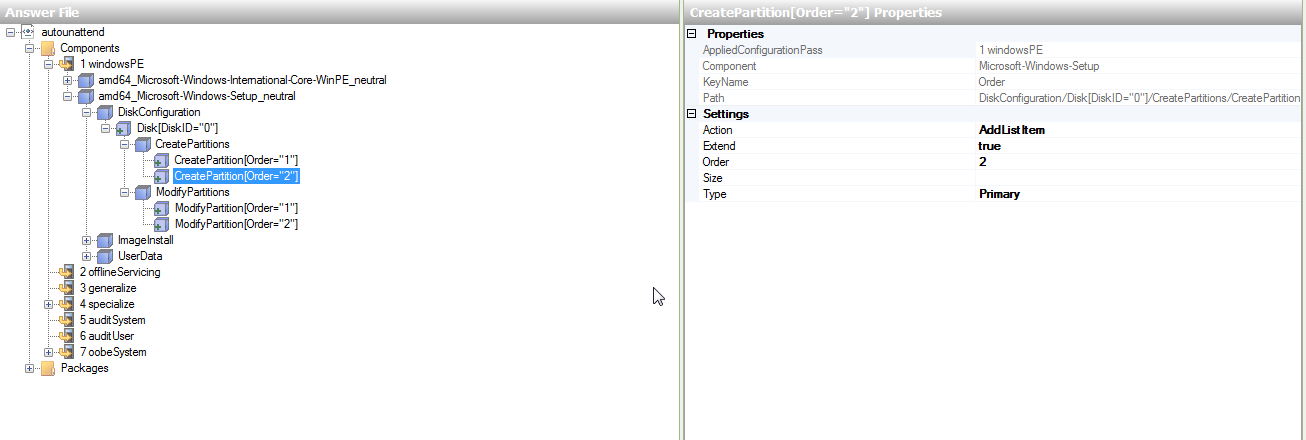
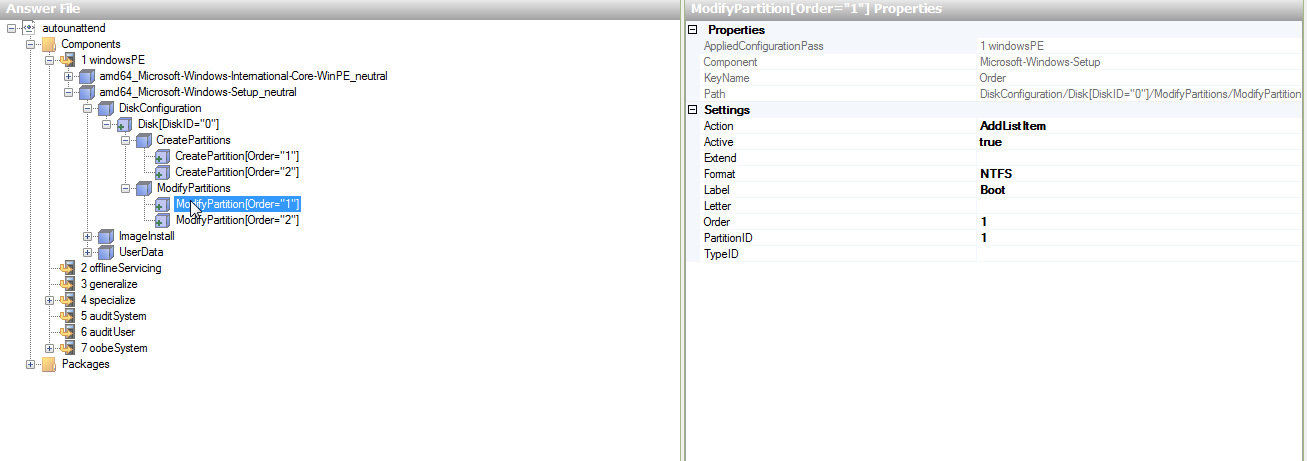
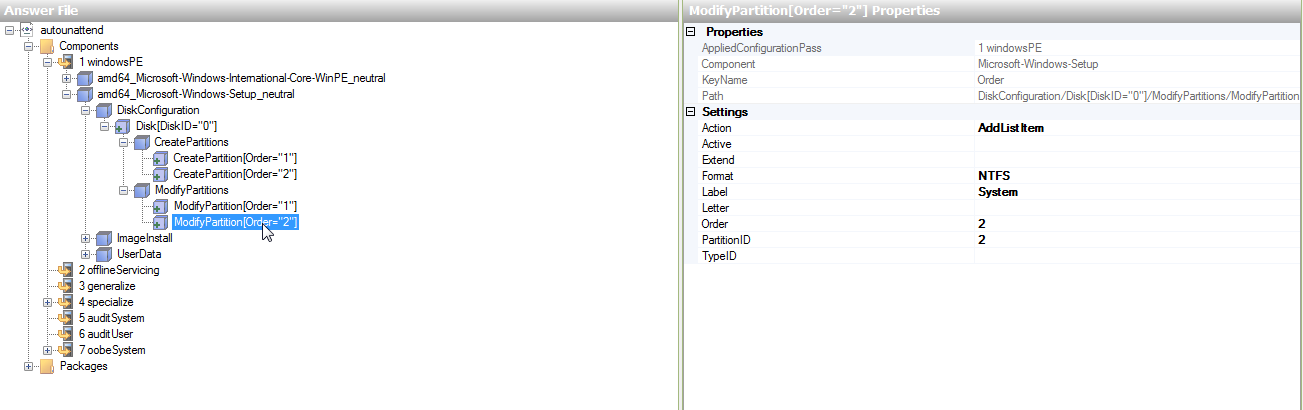
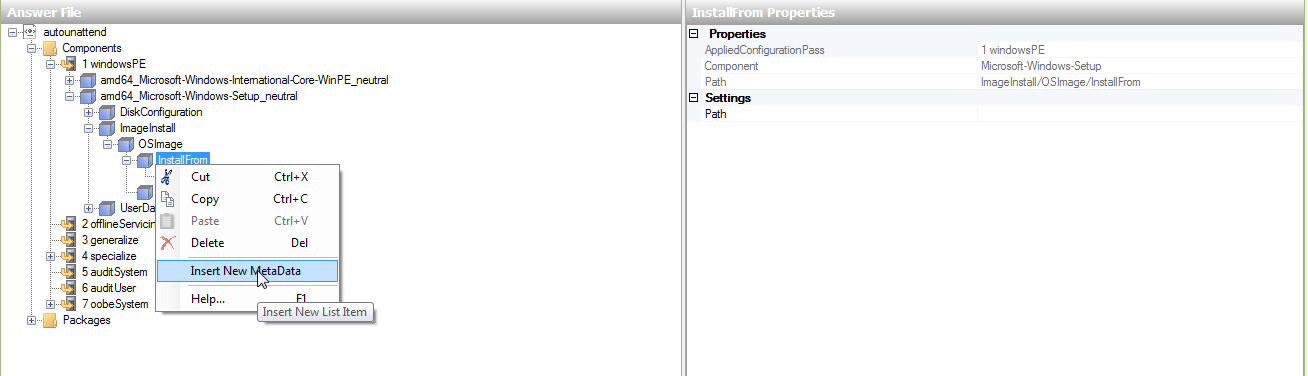
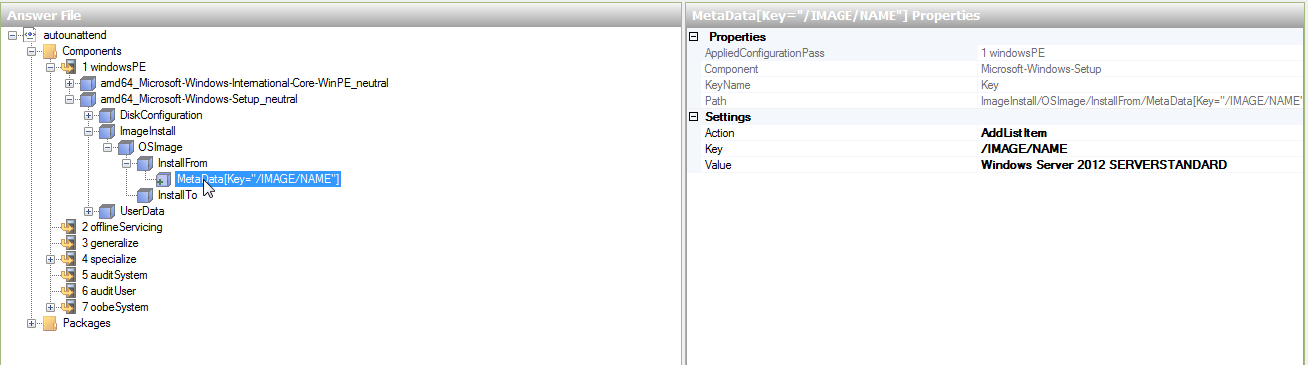
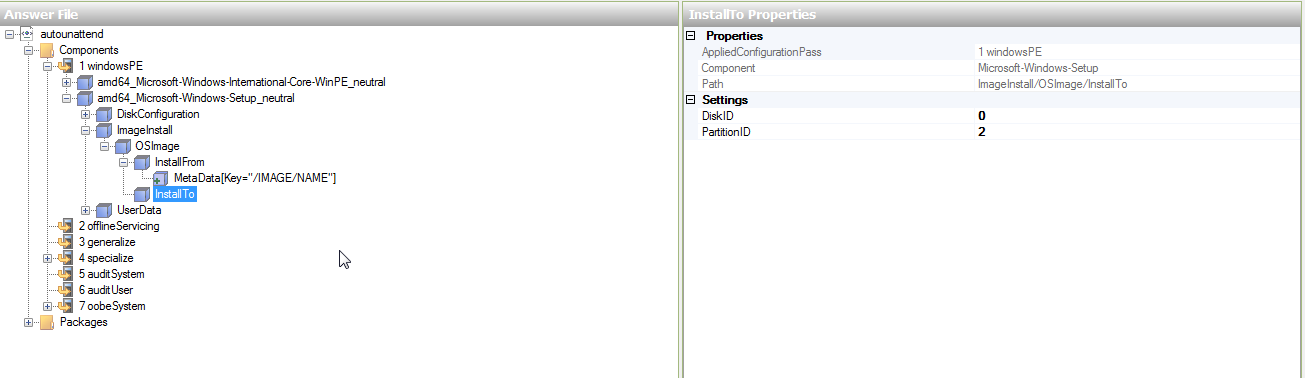
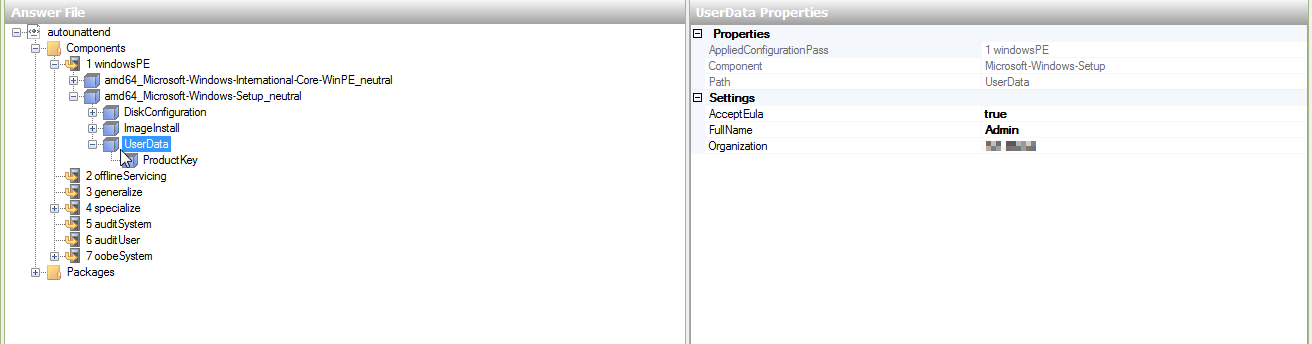
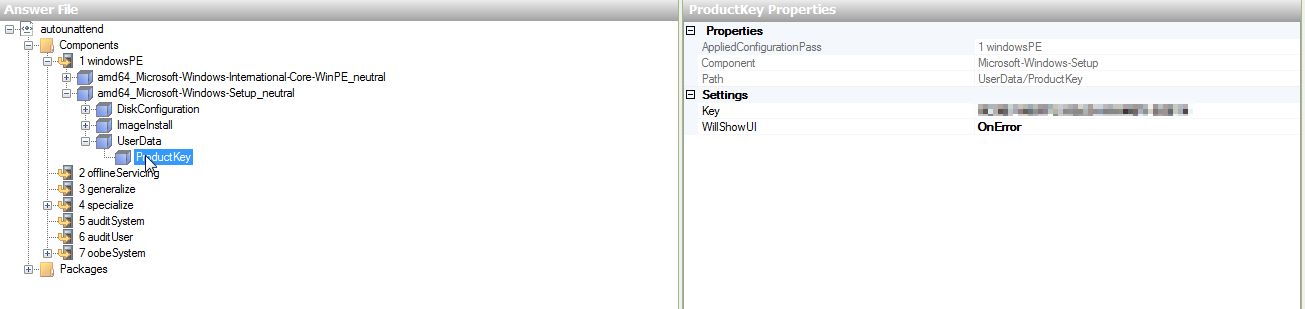
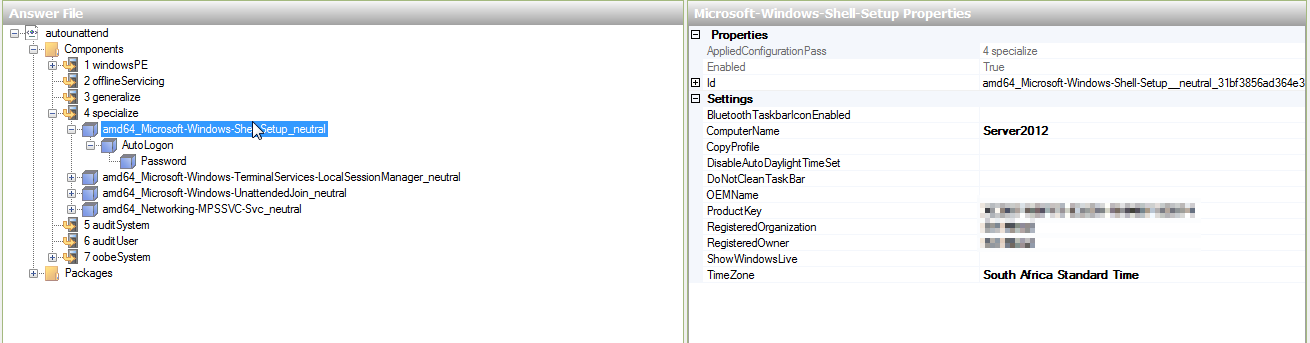
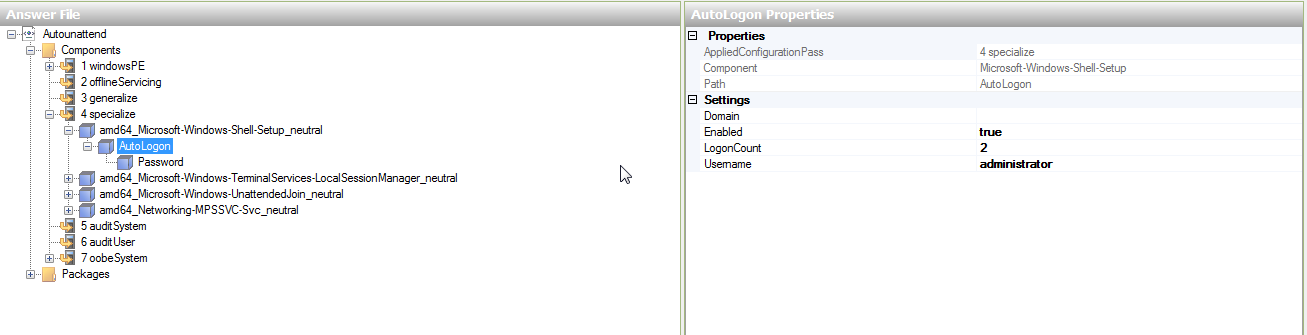
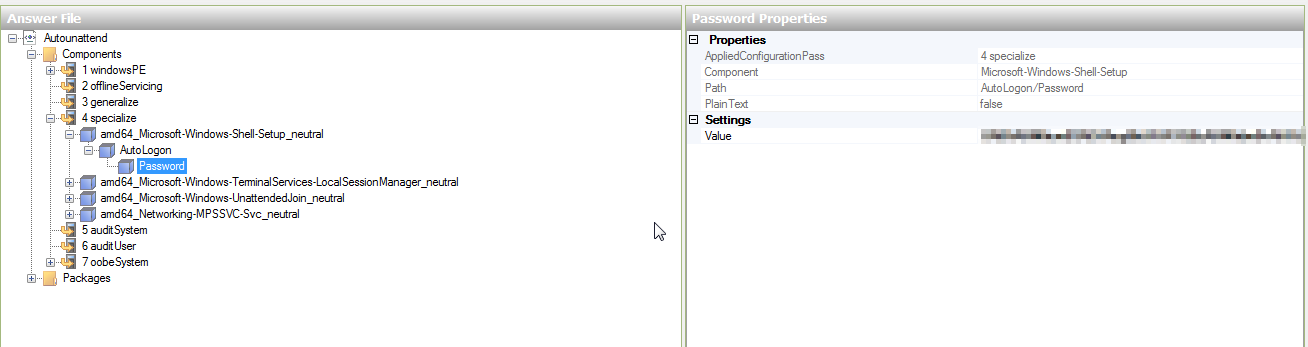
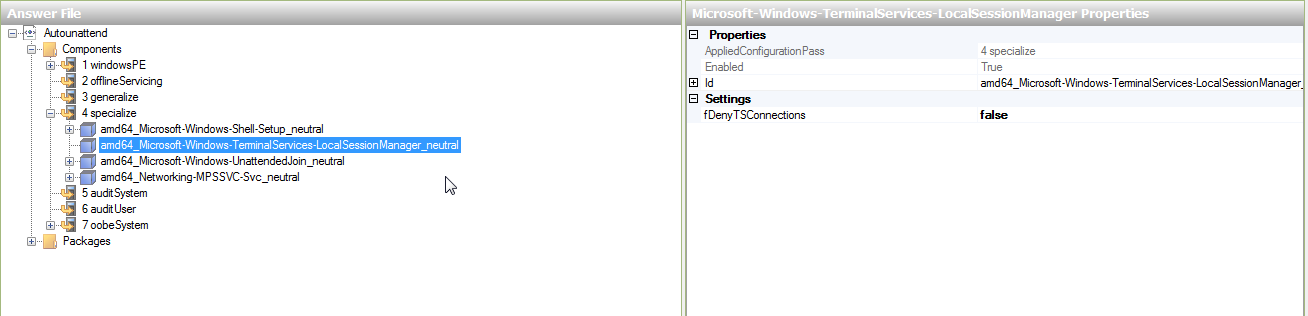
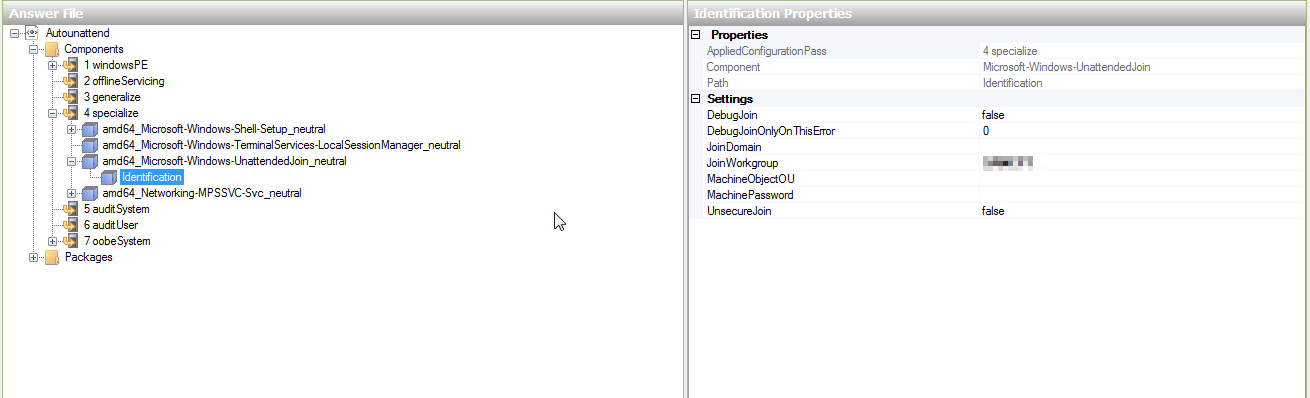
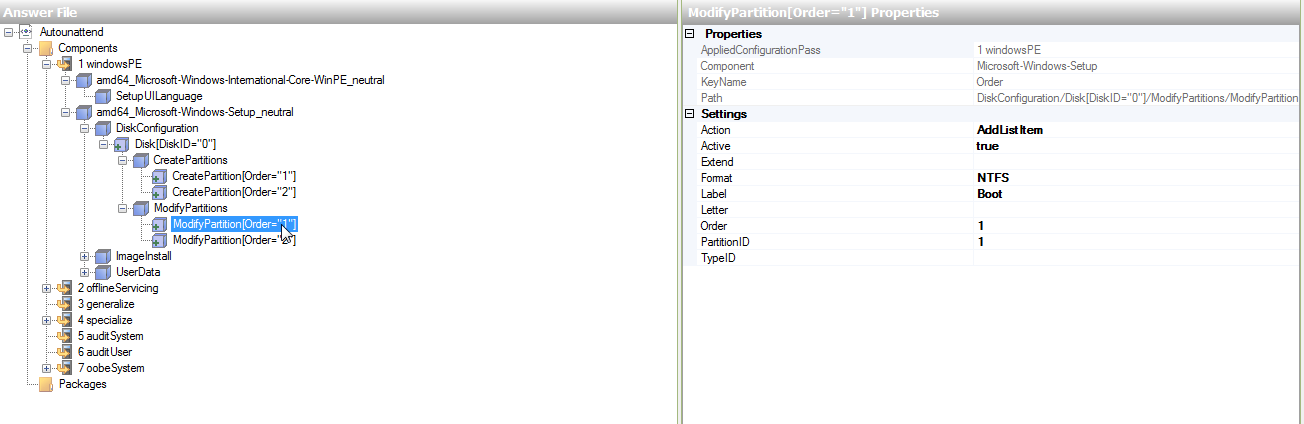
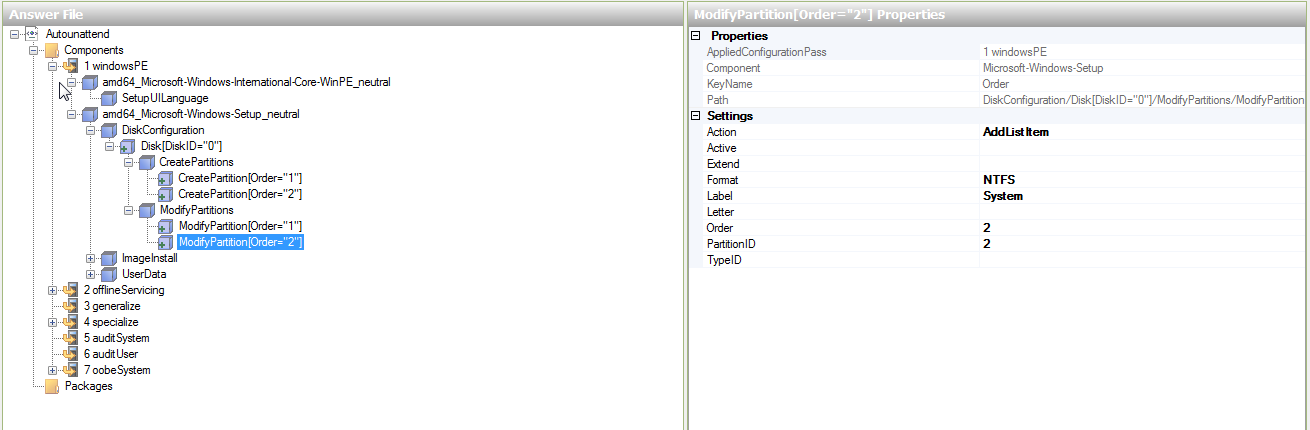
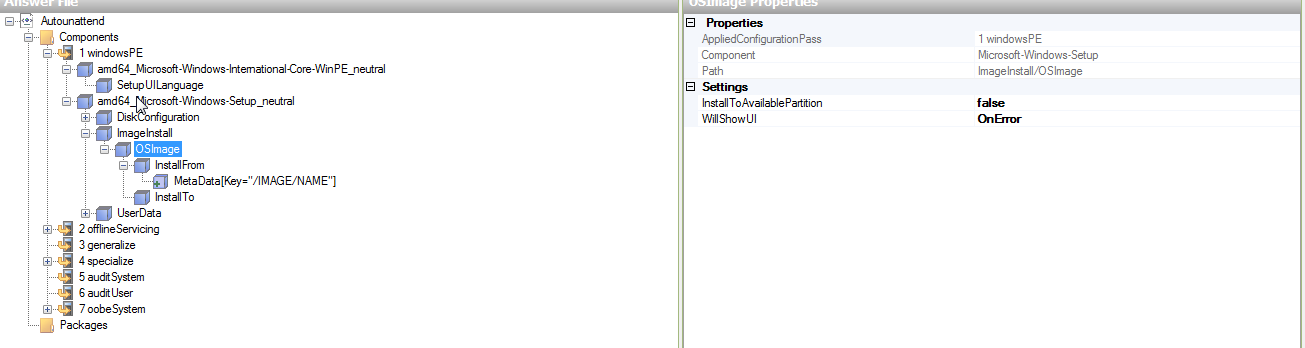
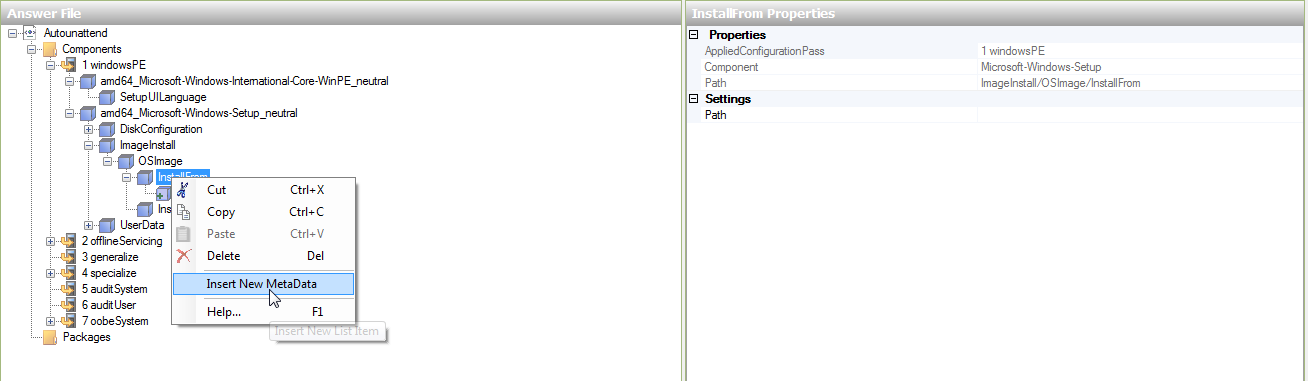
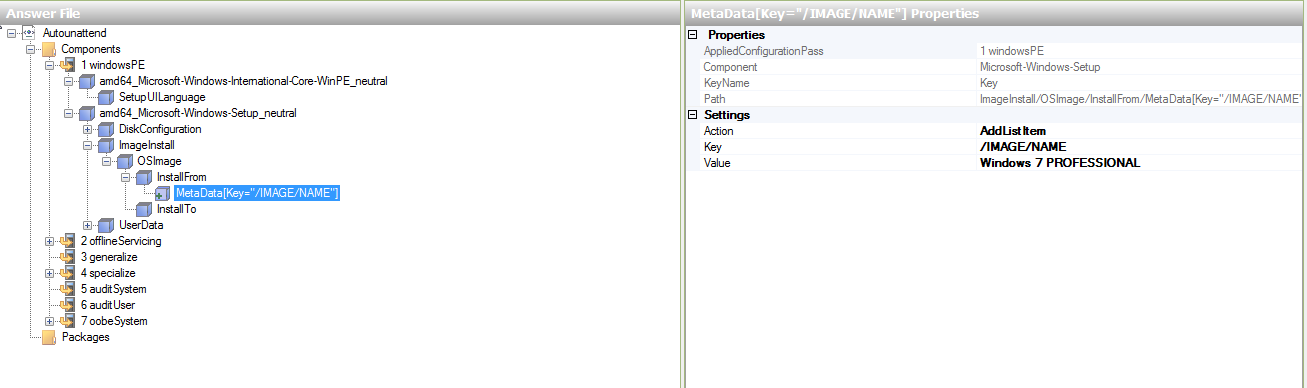
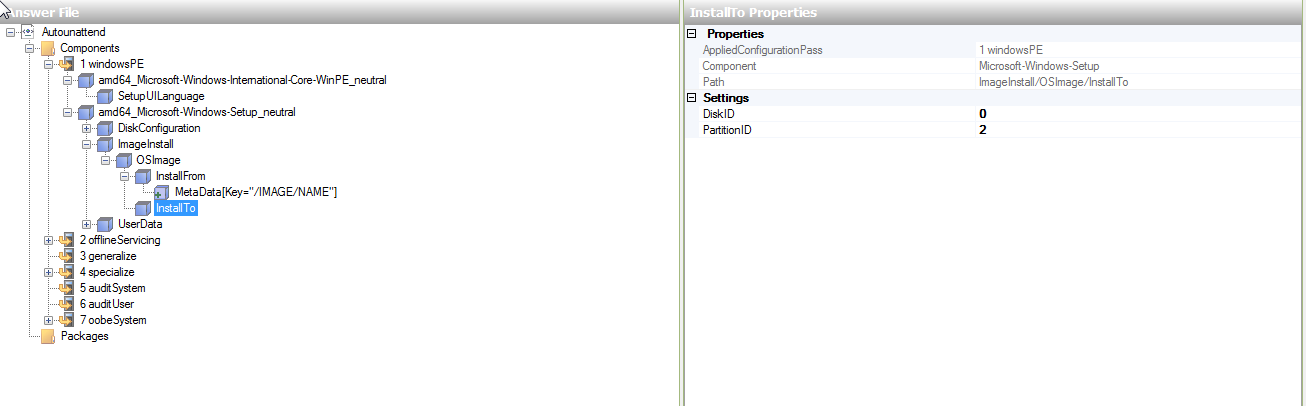
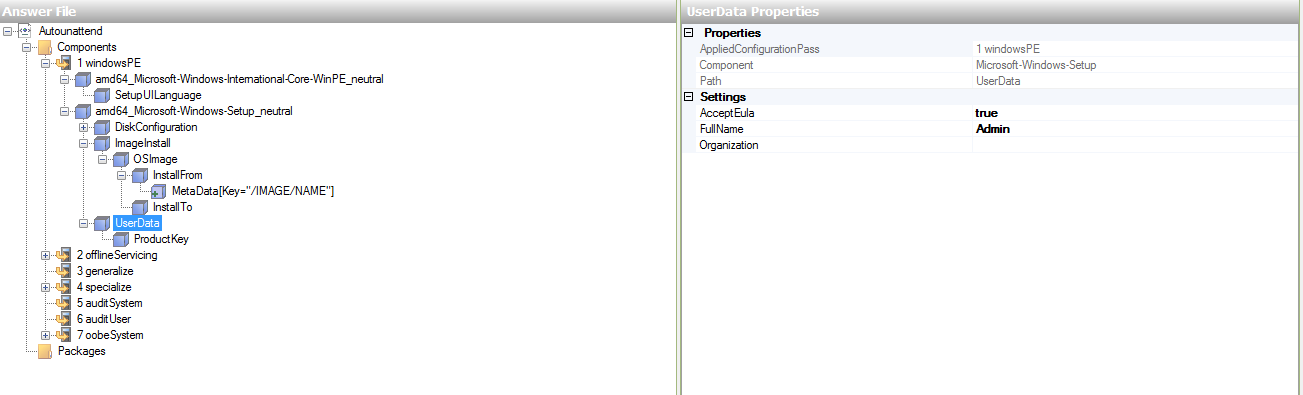
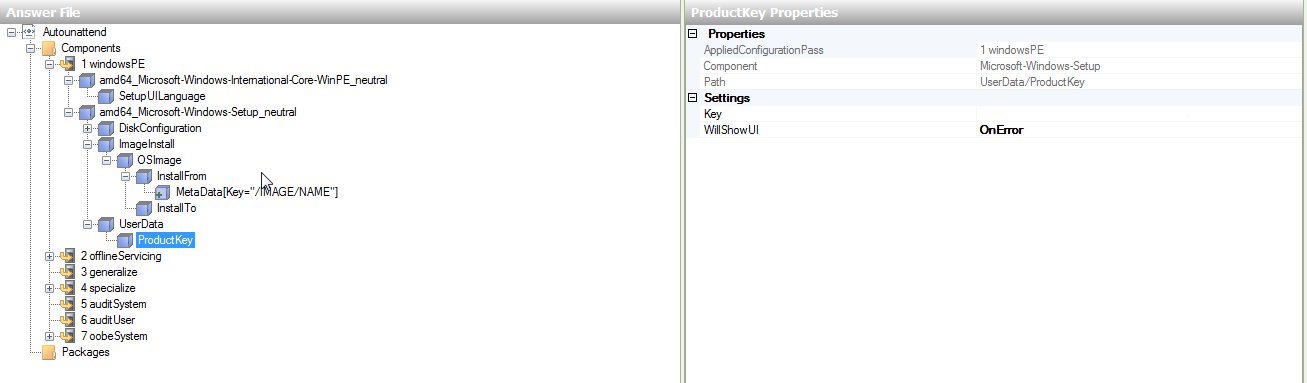
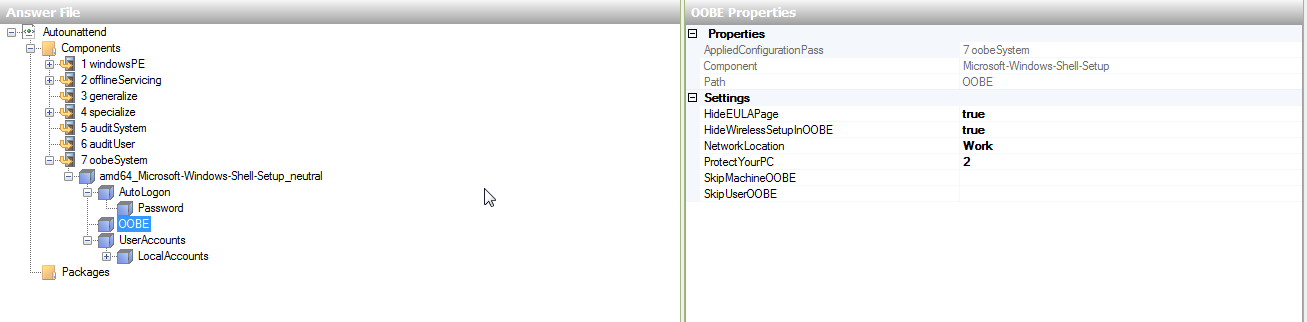
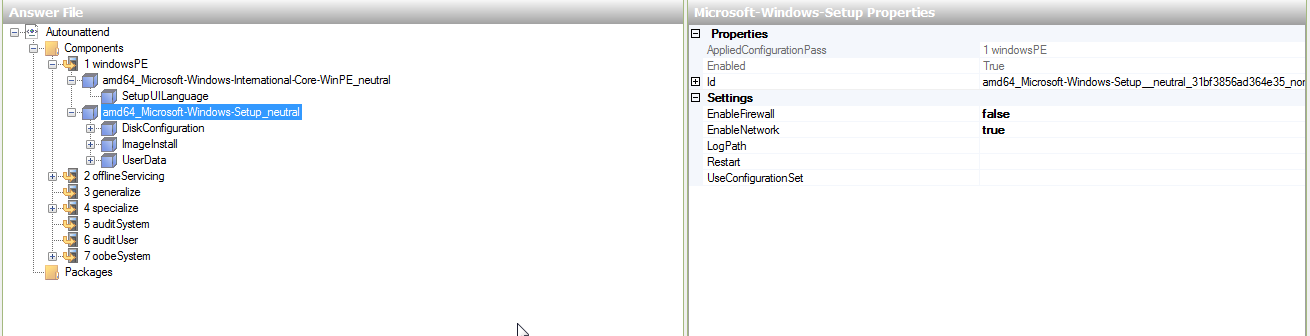
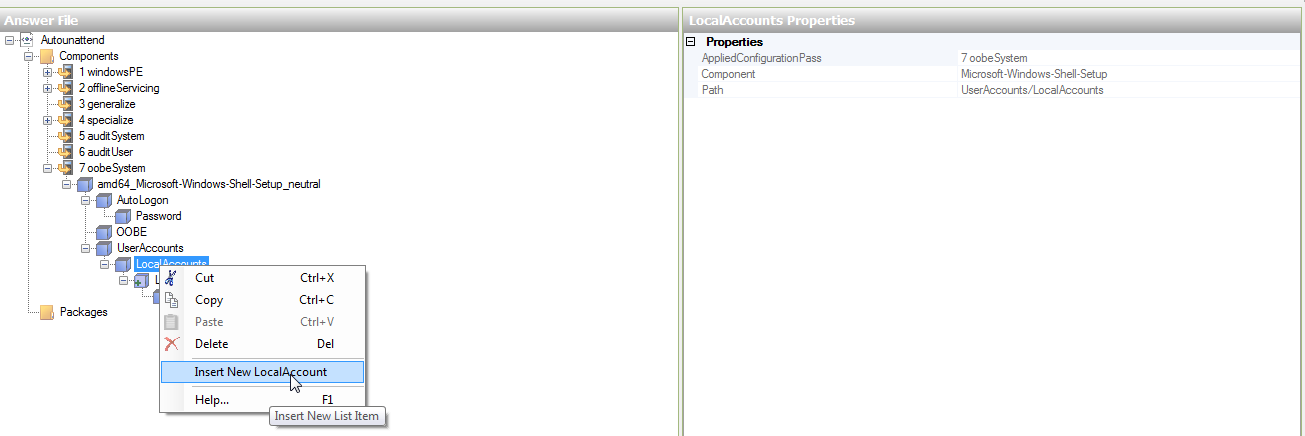
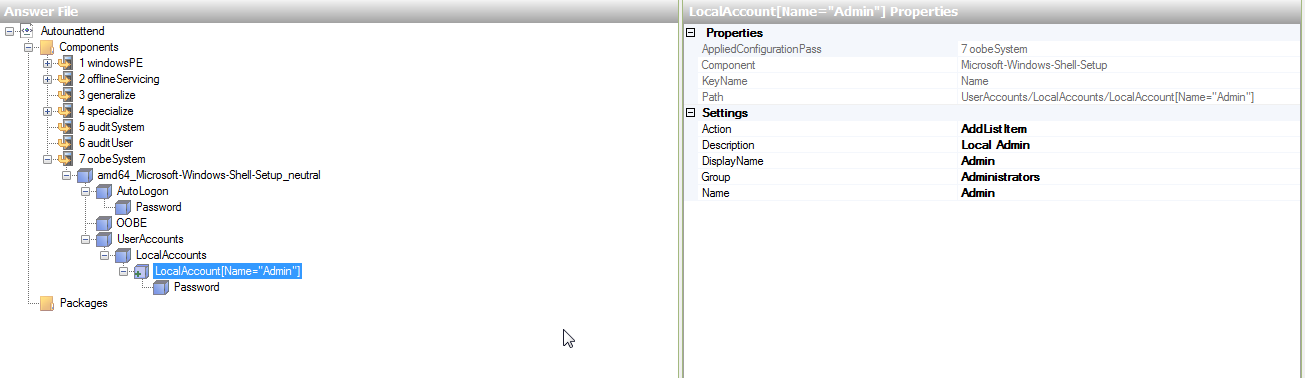
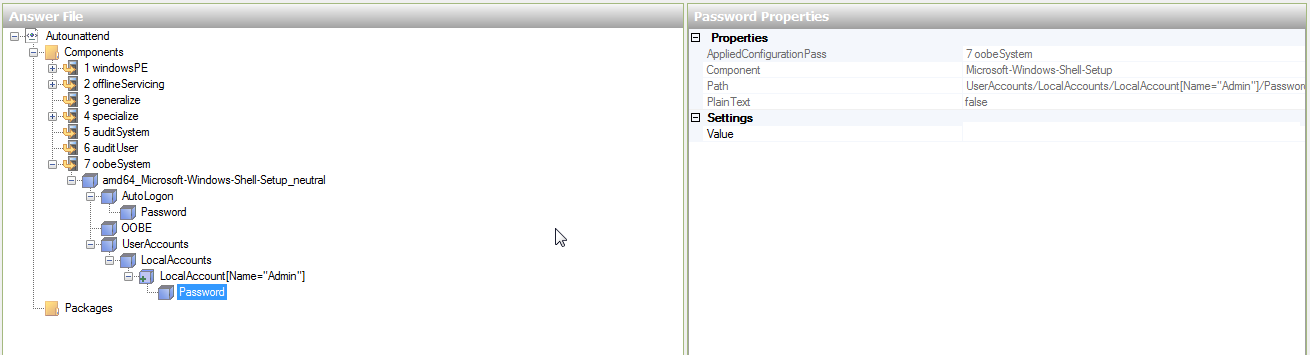
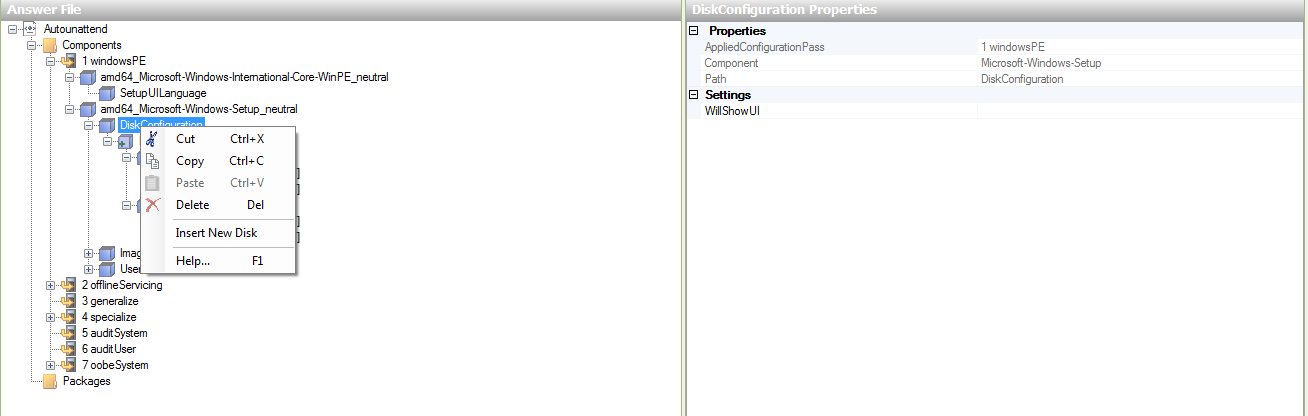
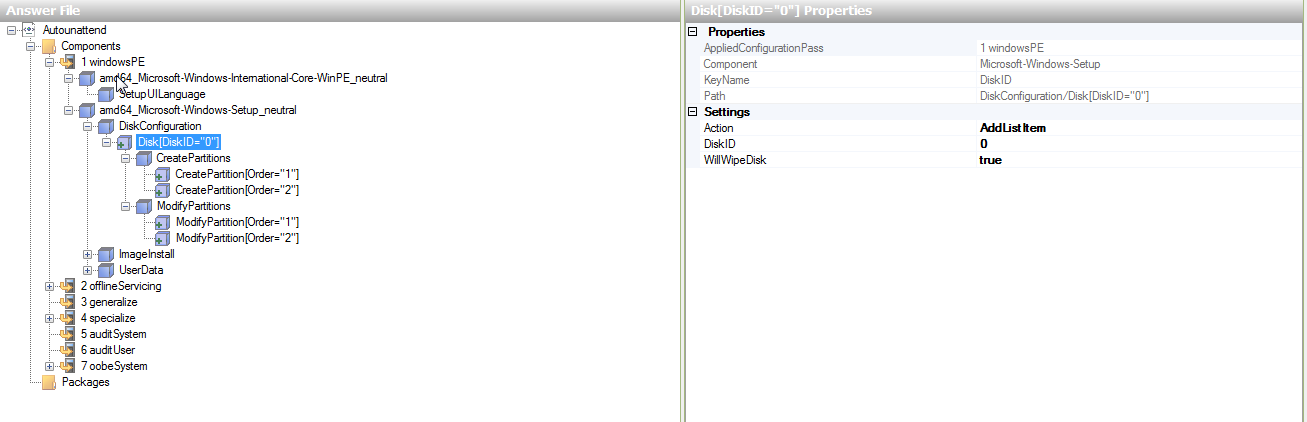
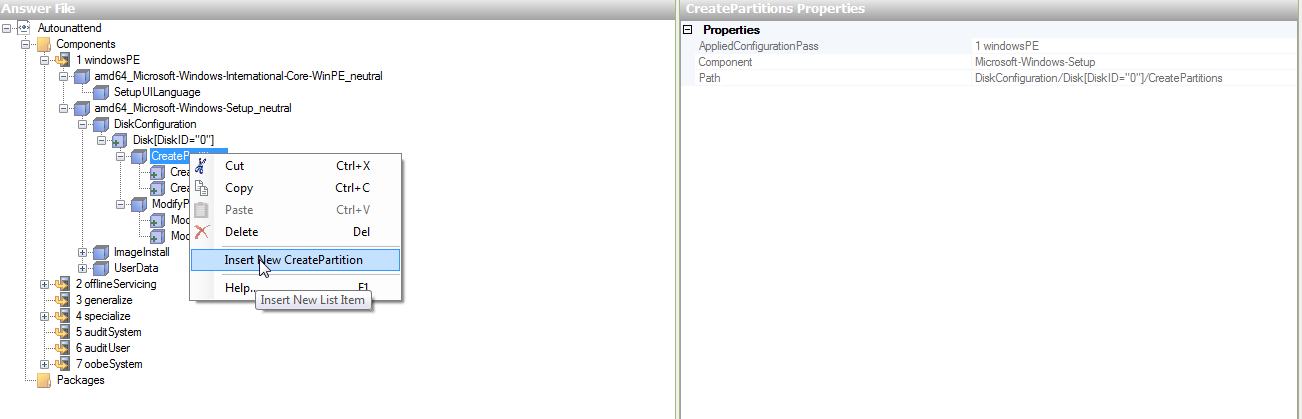
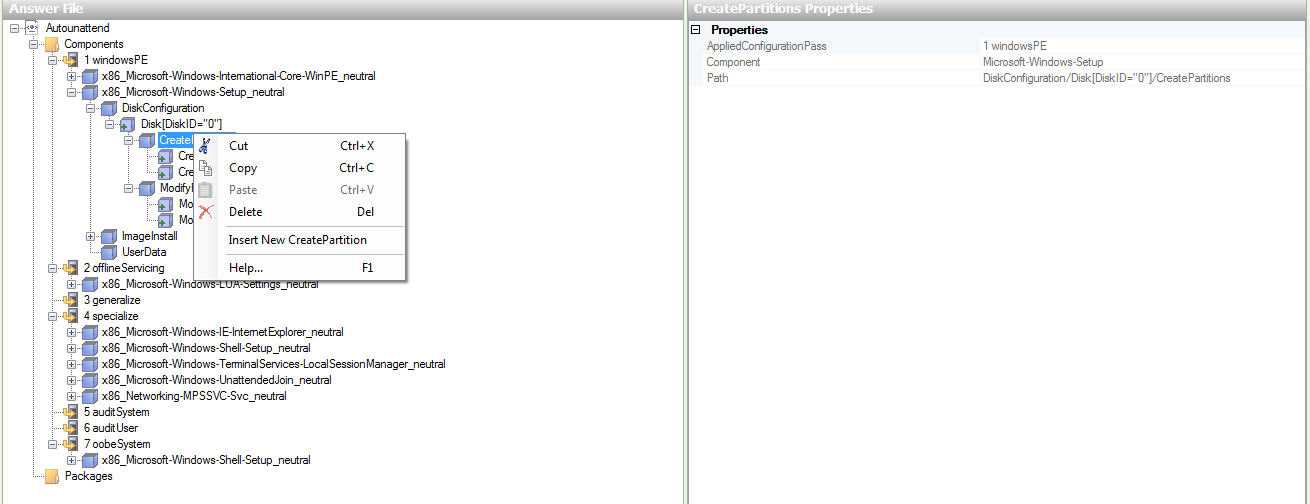
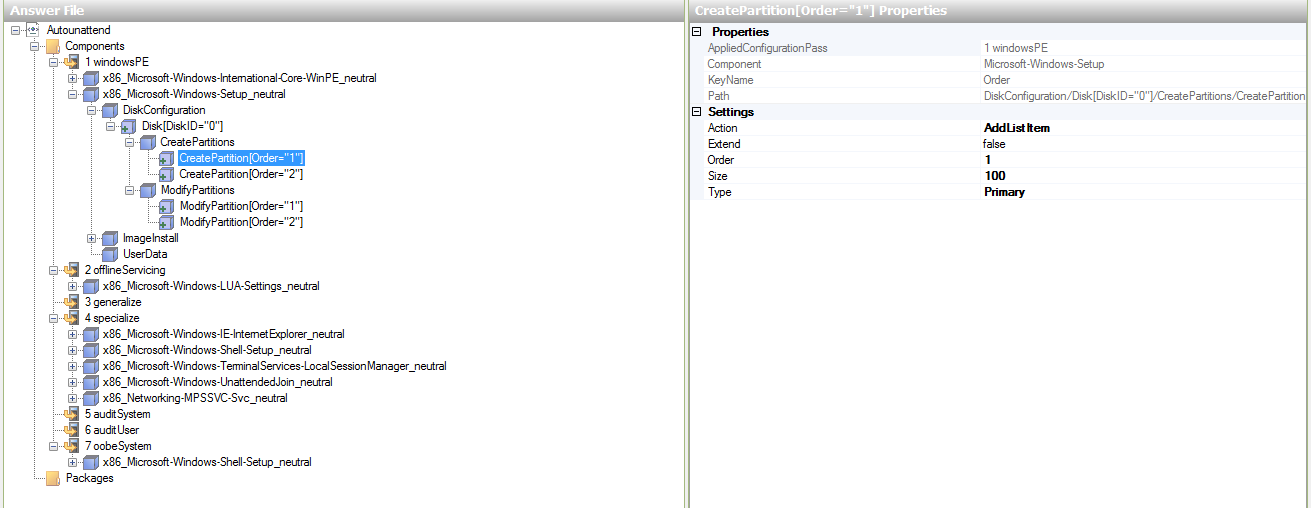
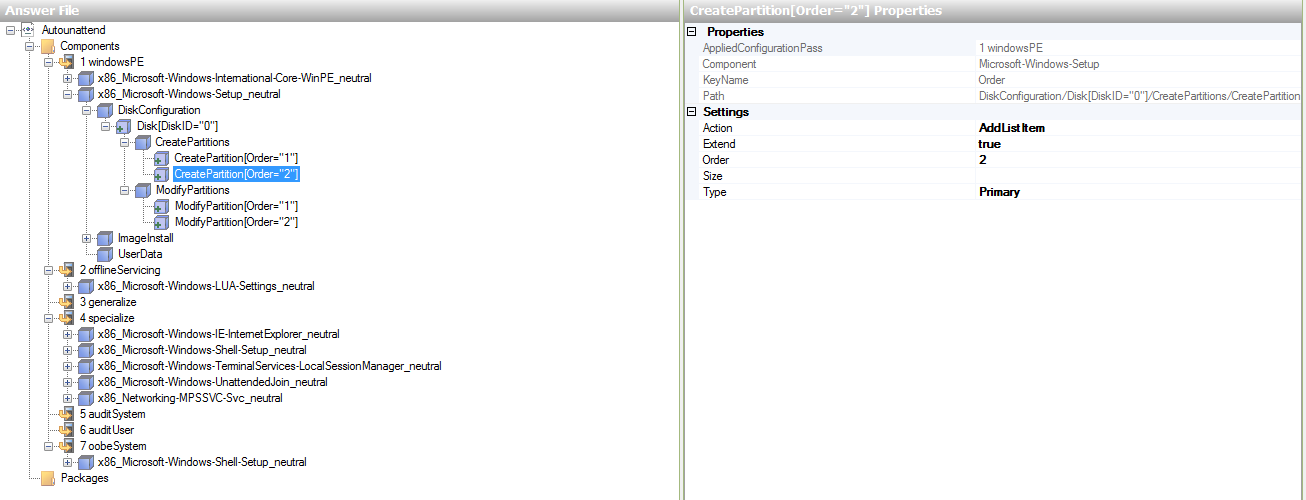
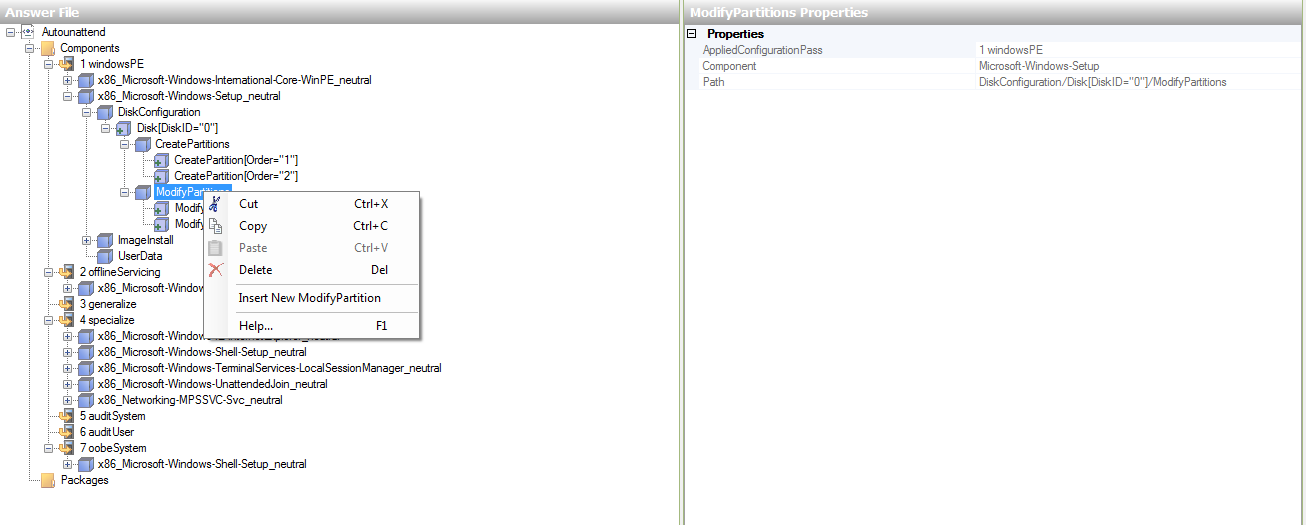
- Follow the below
- Save the autounattend.xml file to the root of the copied OS
- Use ImgBurn to Write a Bootable ISO
- Click Advanced > Bootable Disk > Make Image Bootable
- Boot Image:
\boot\etfsboot.com
Server 2012
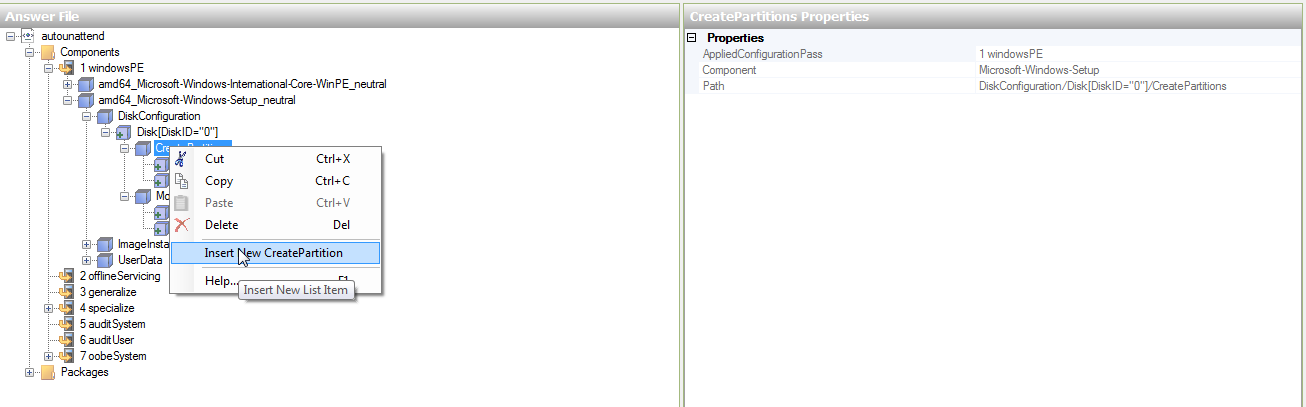
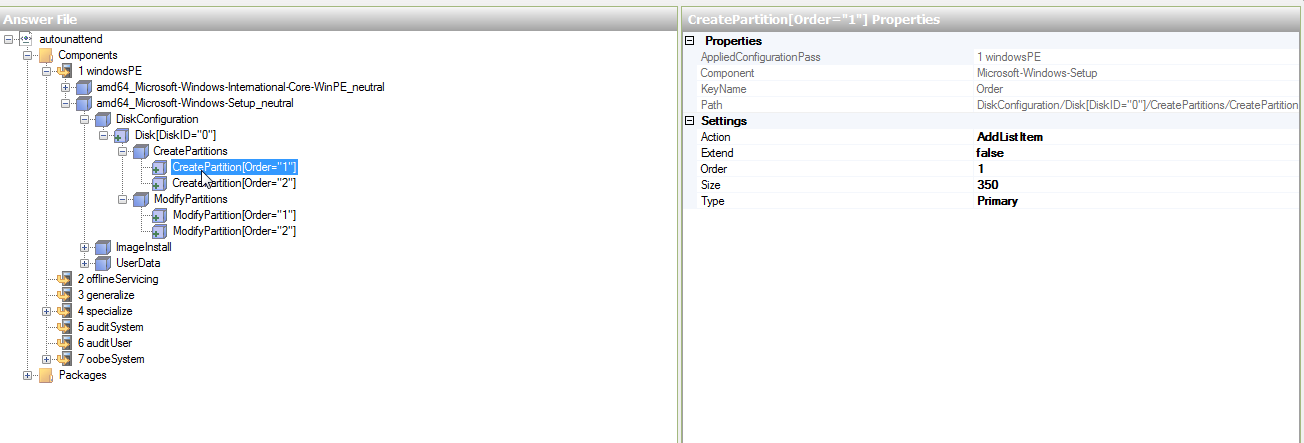
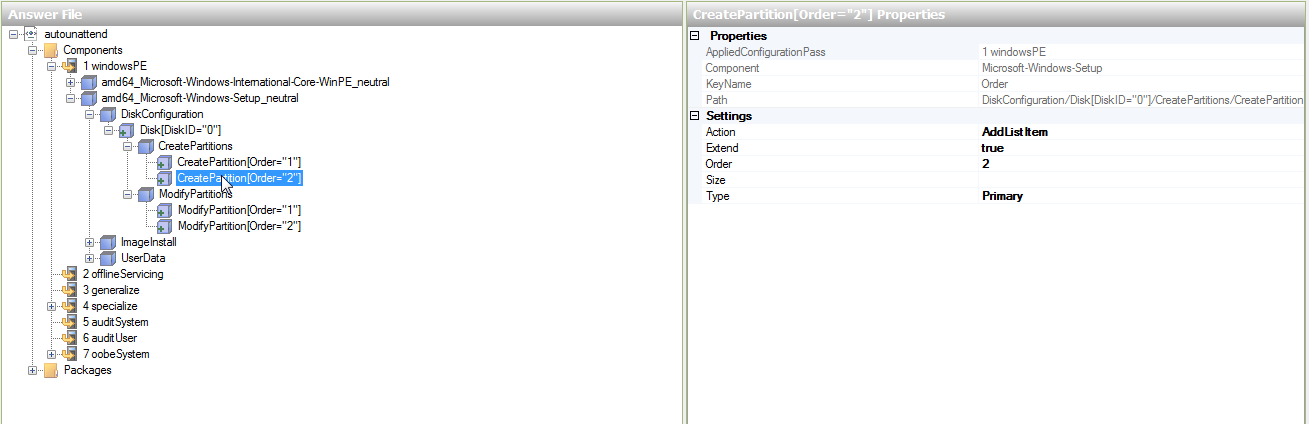
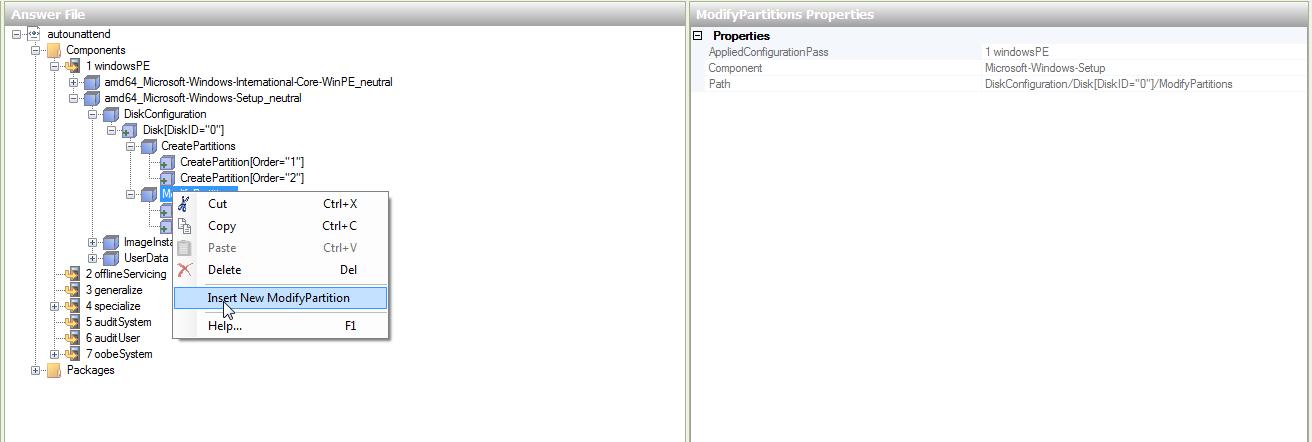
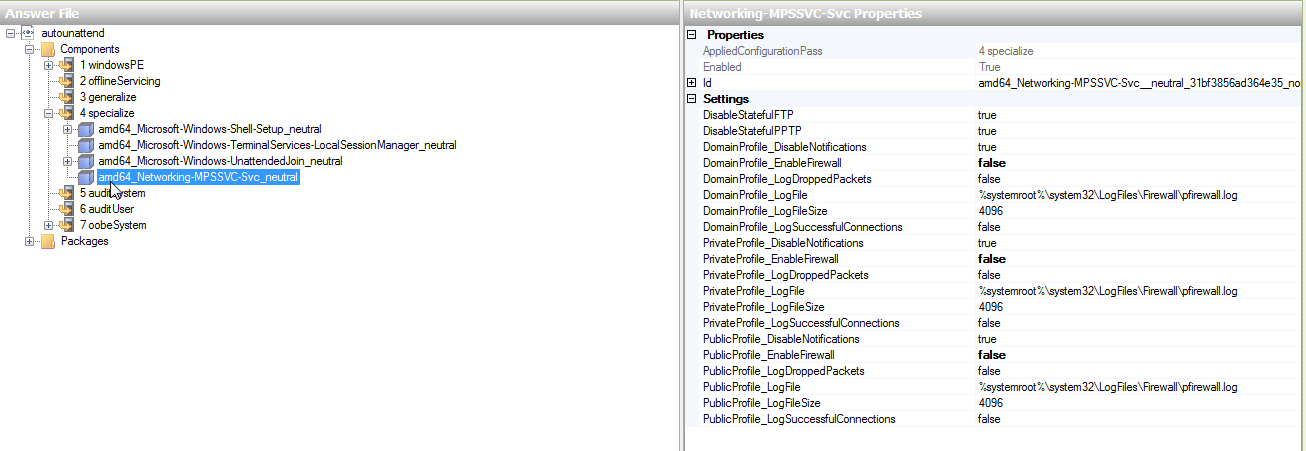
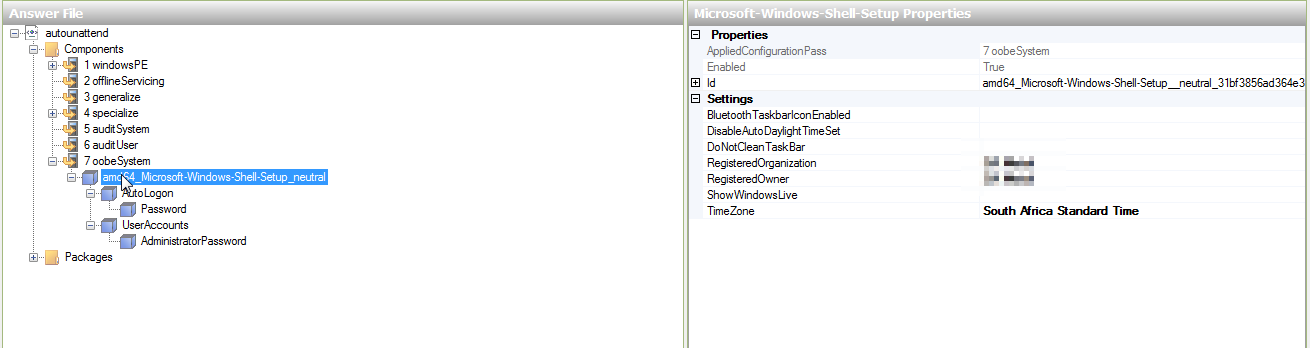
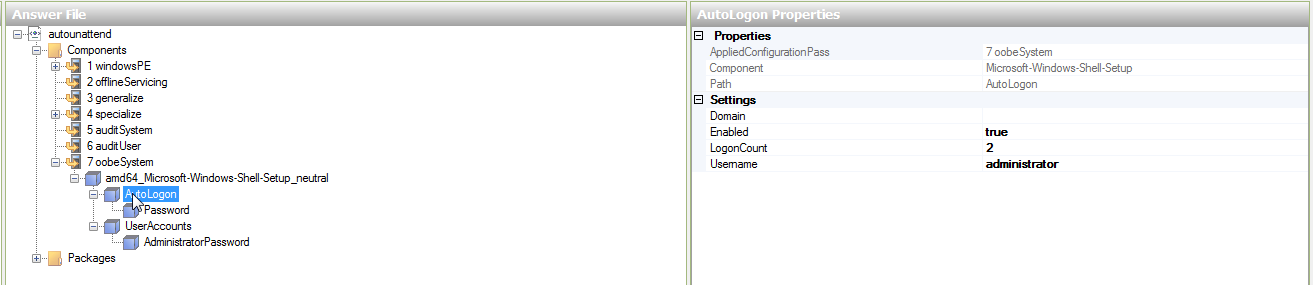
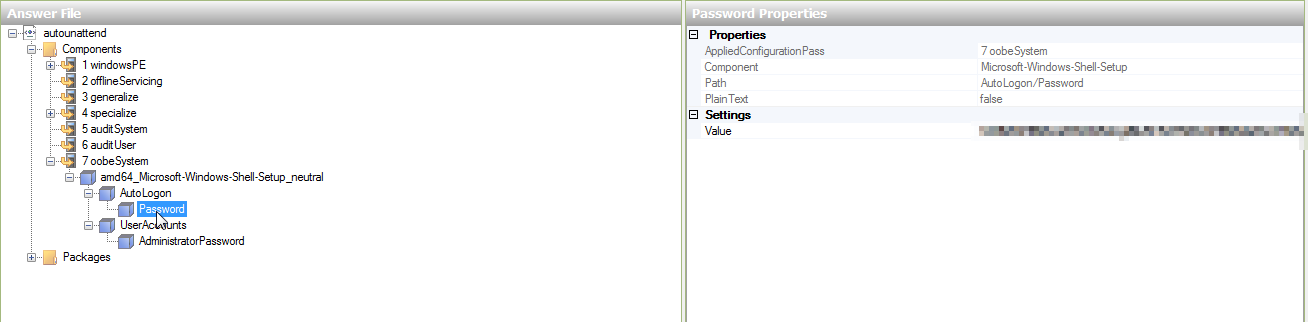
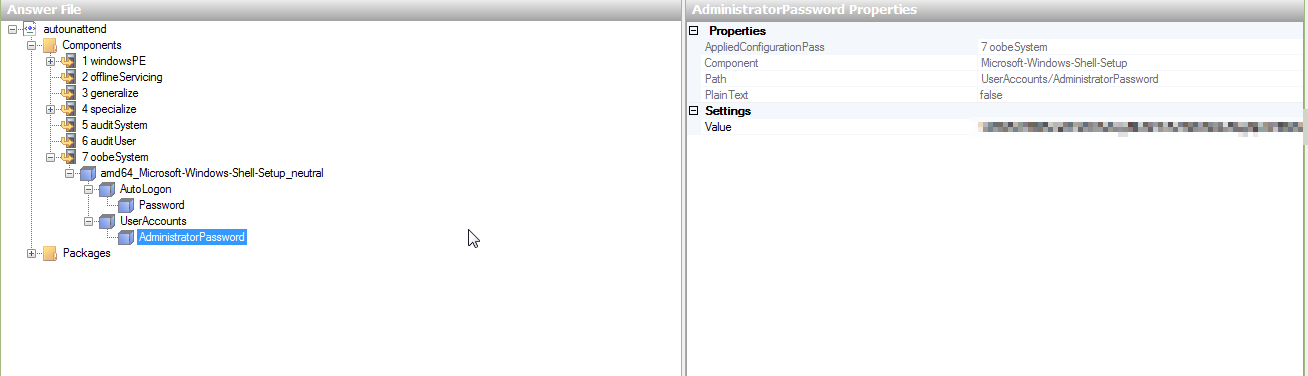
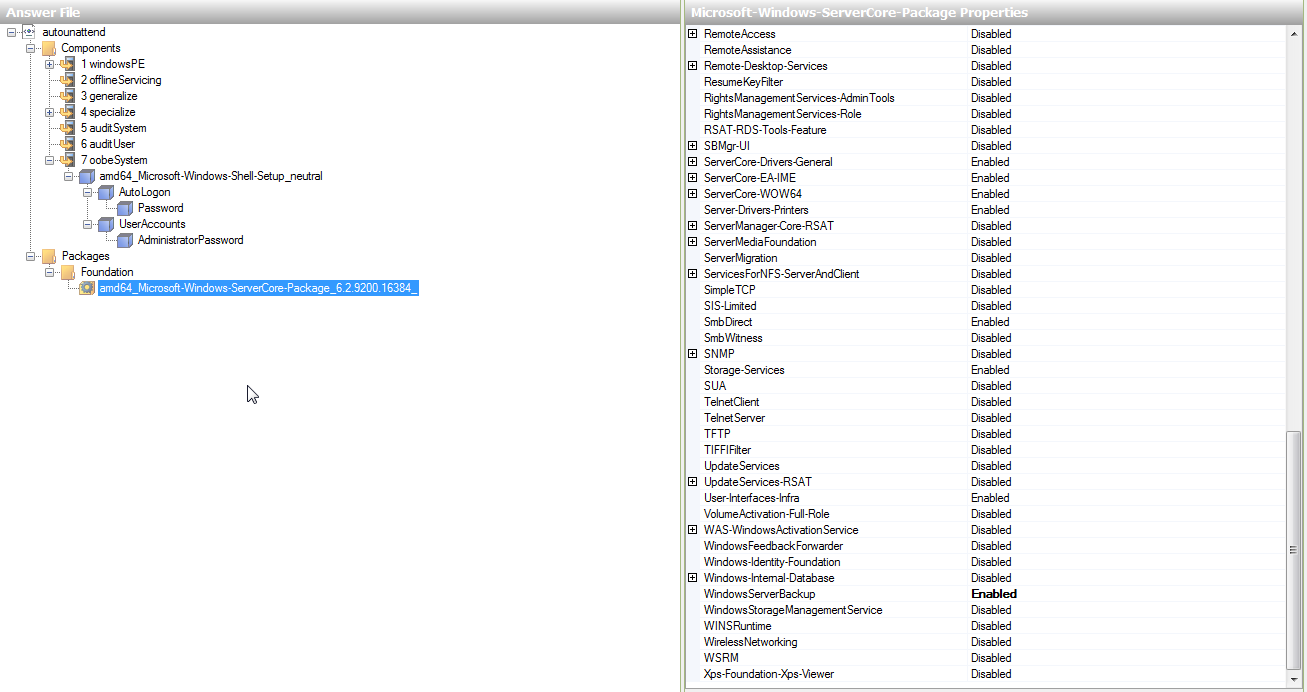
Server 2008 R2
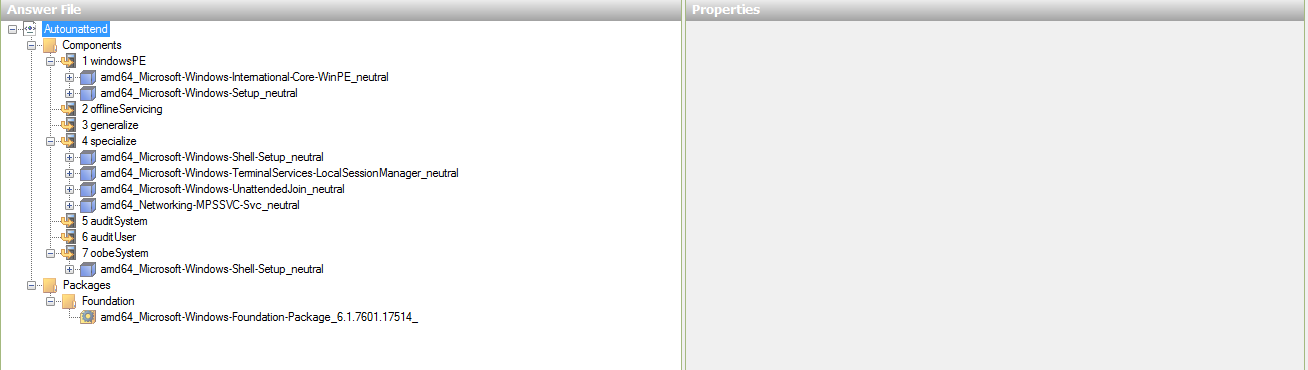
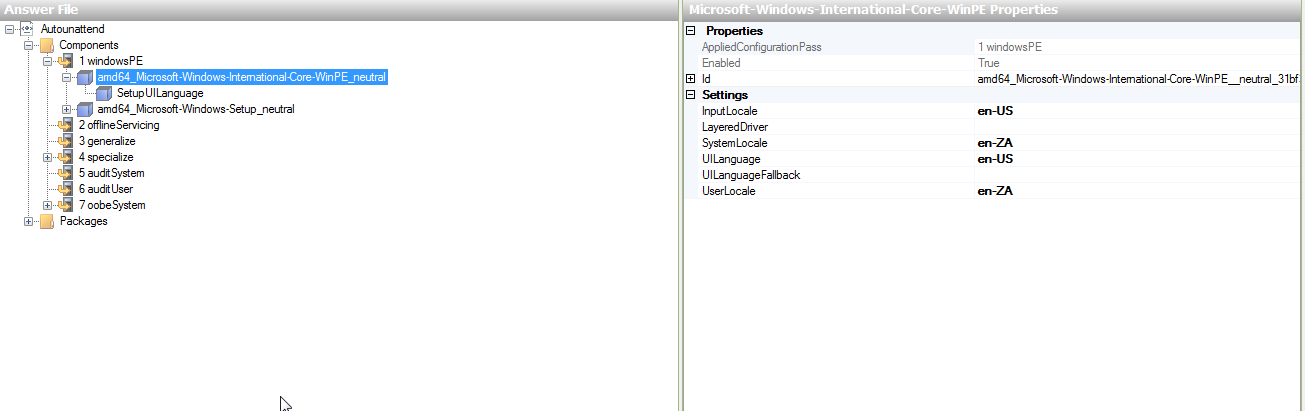
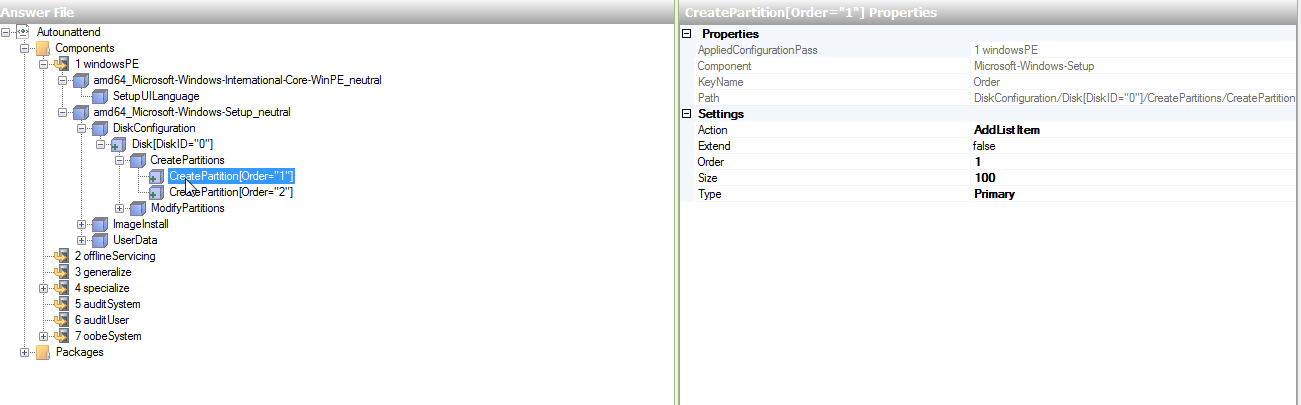
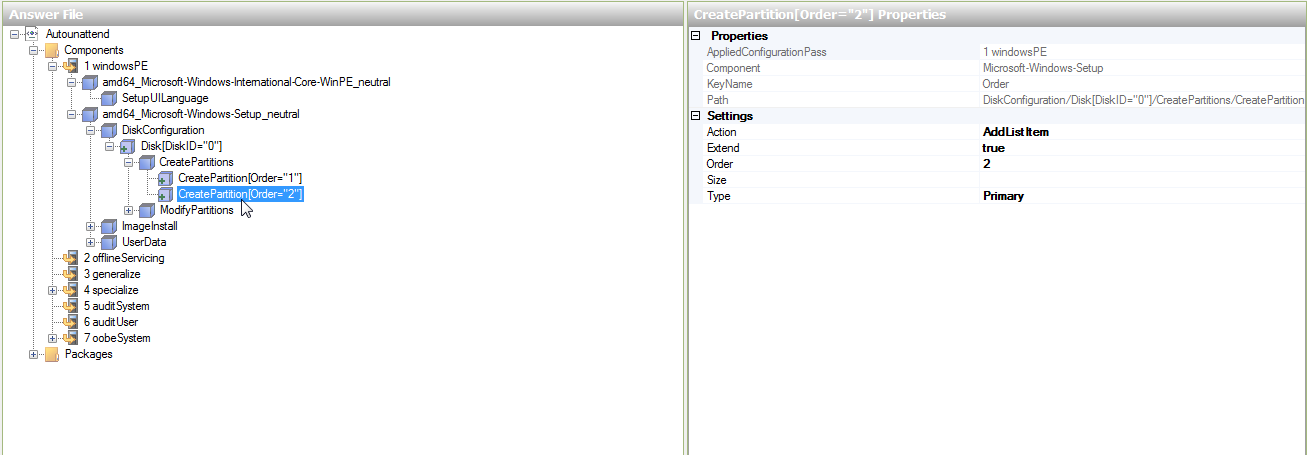
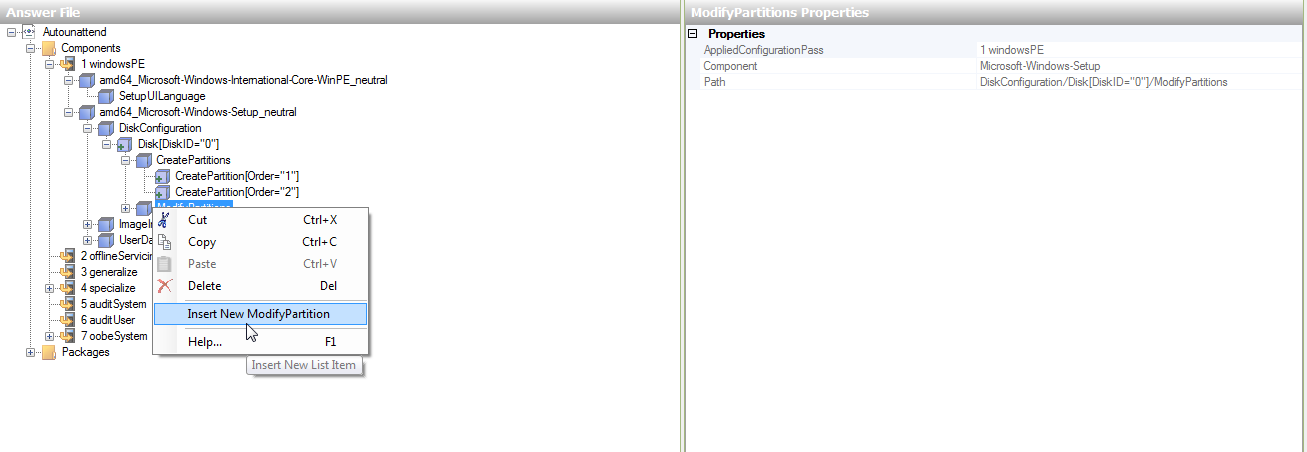
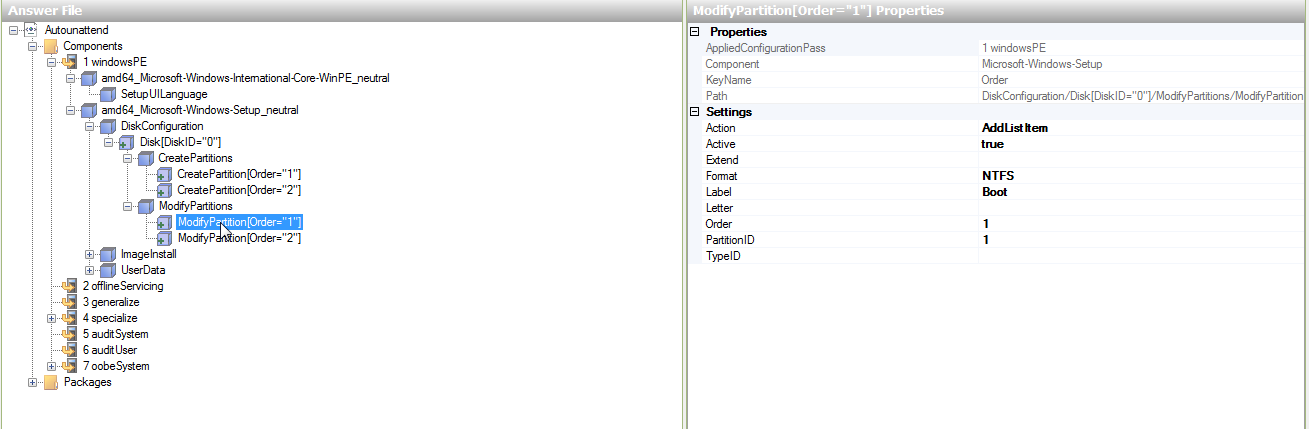
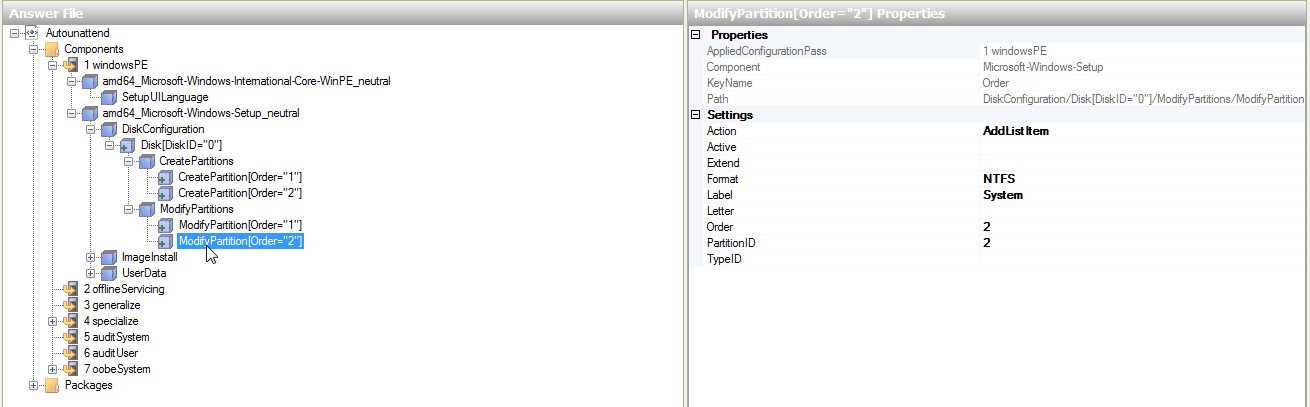
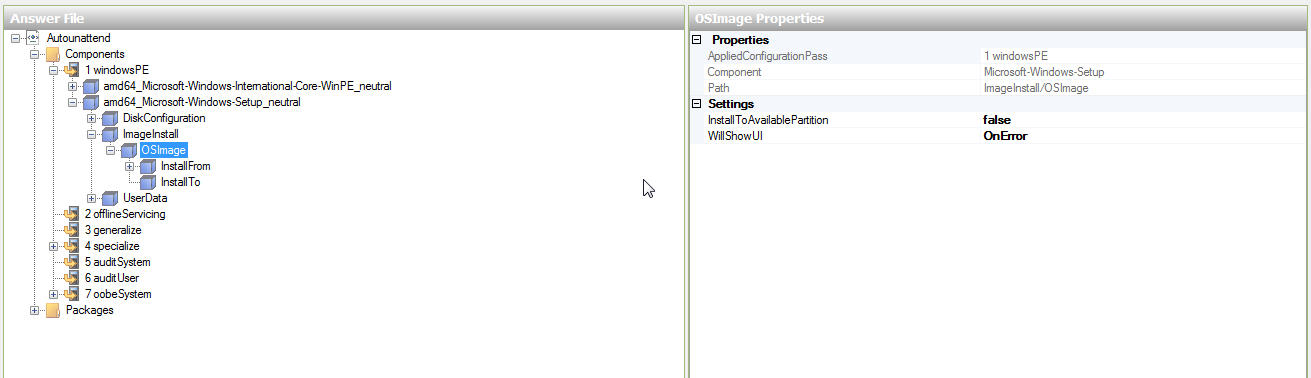
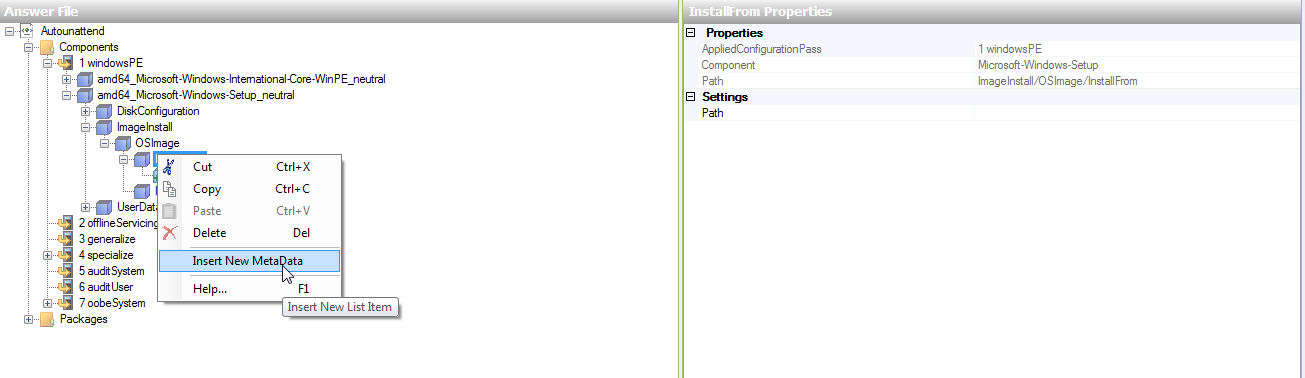
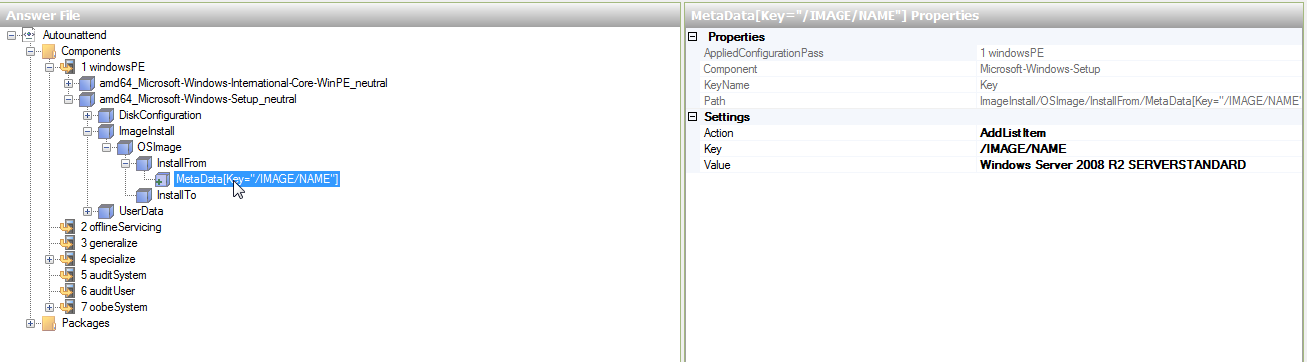
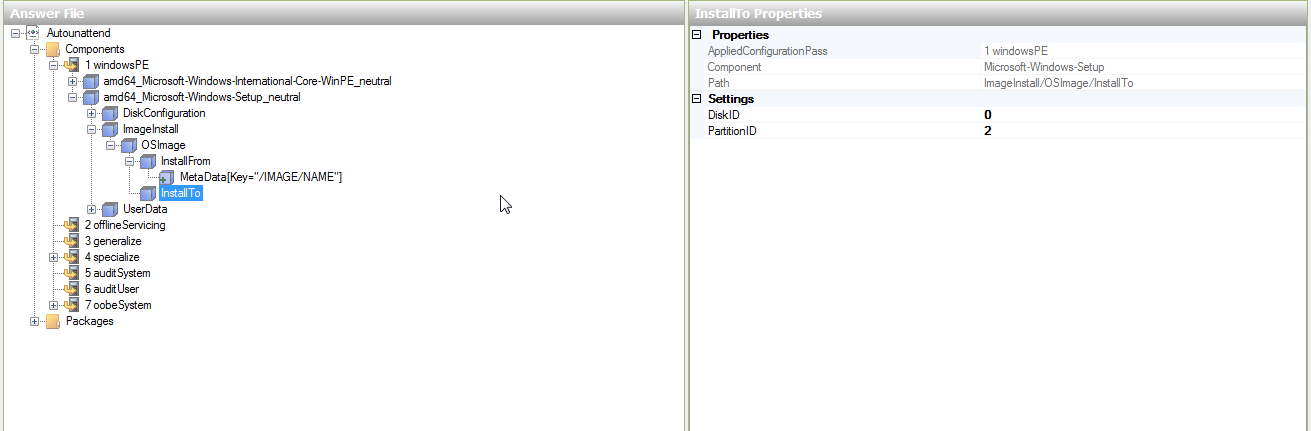
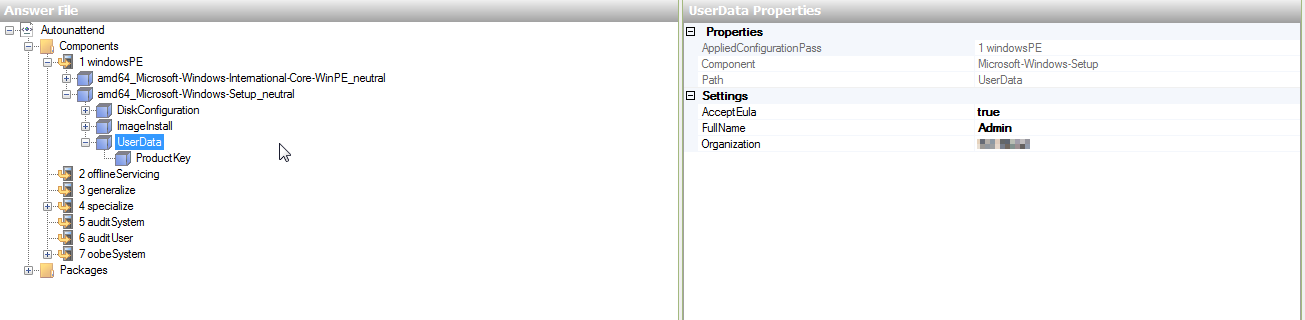
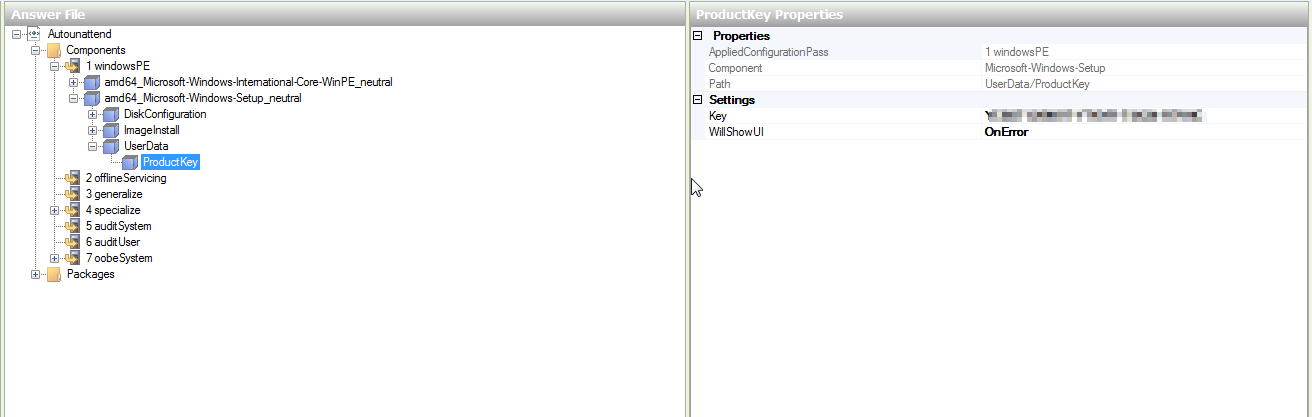
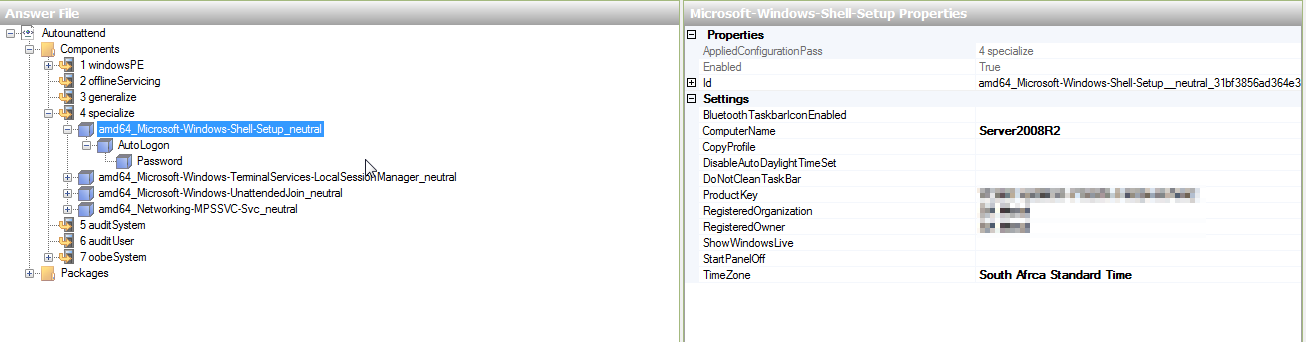
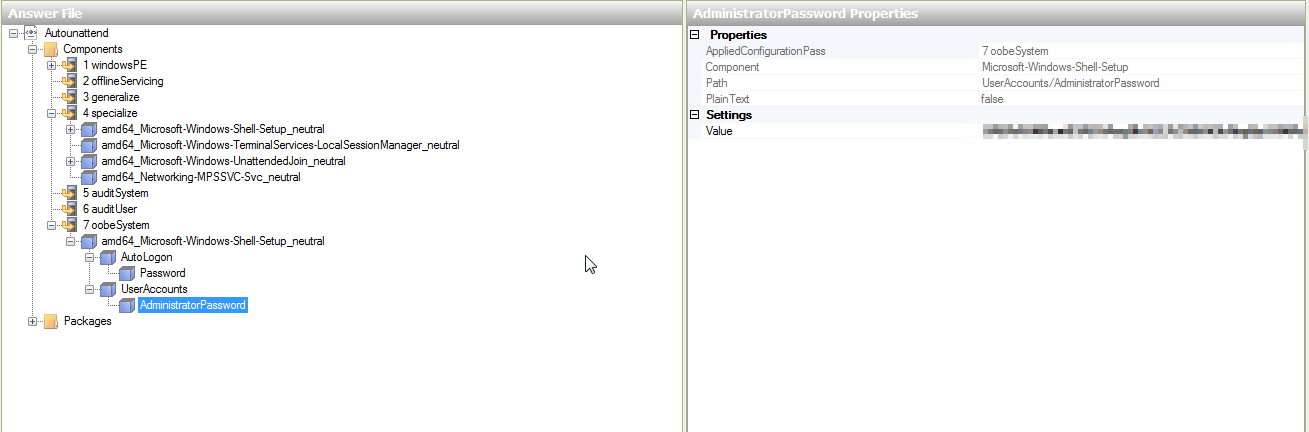
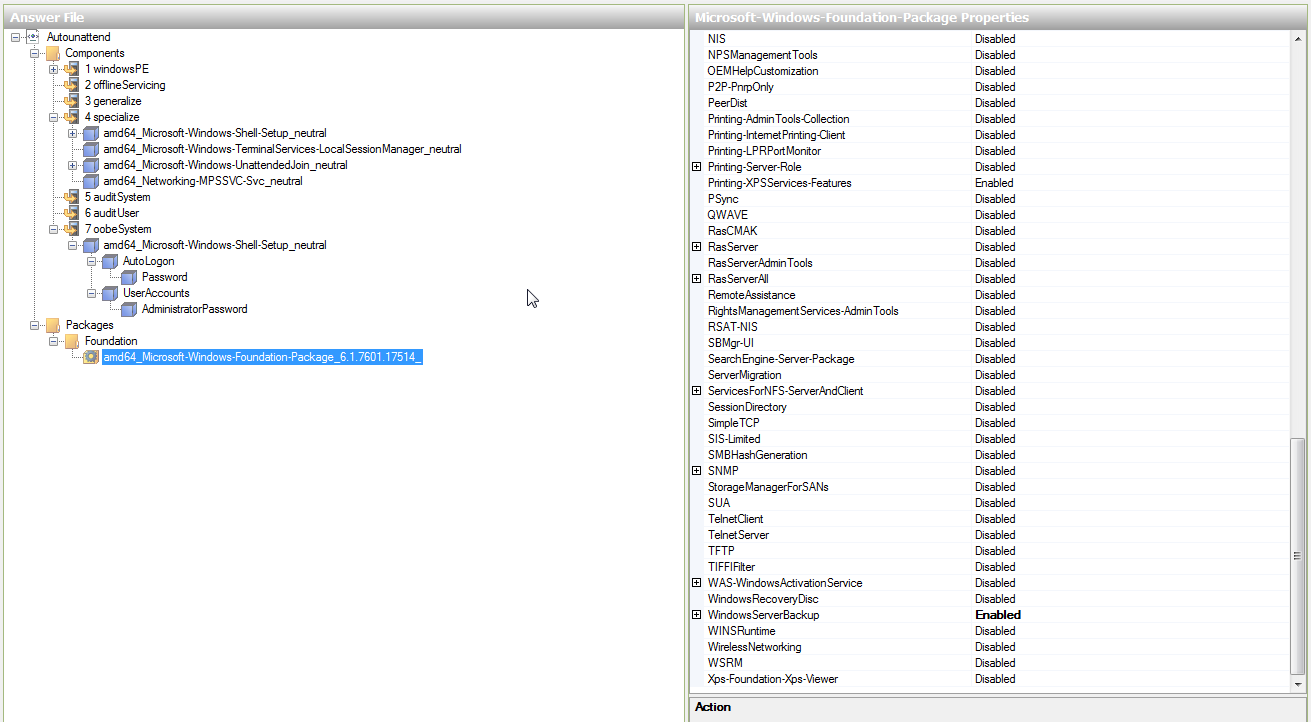
Windows 7 64-bit
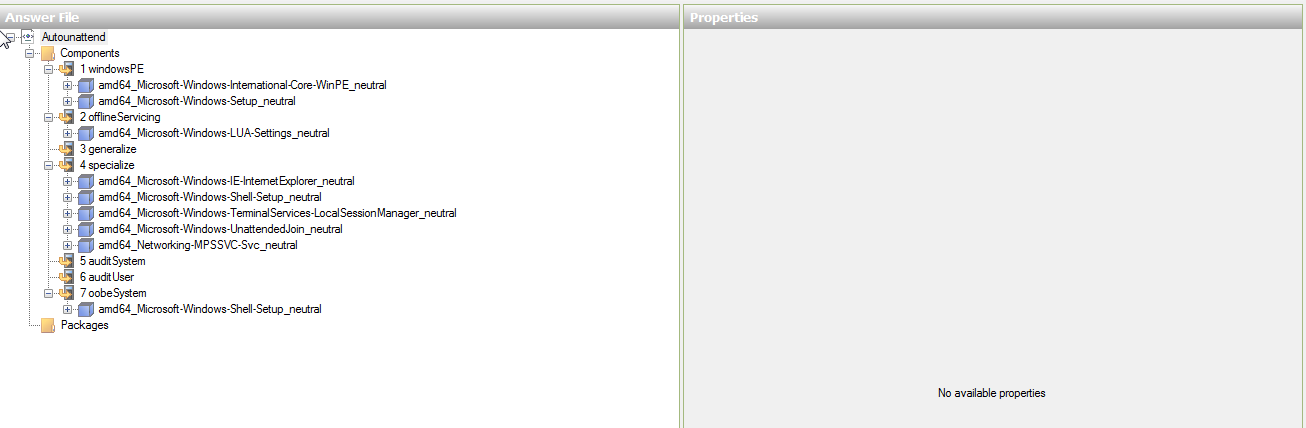
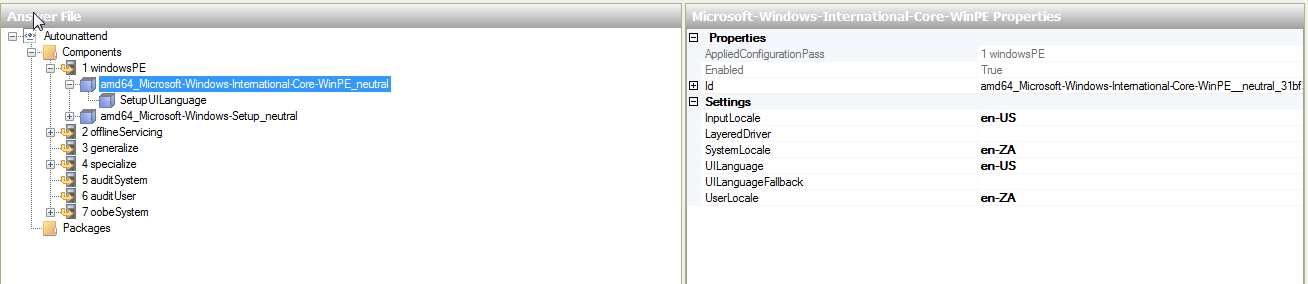
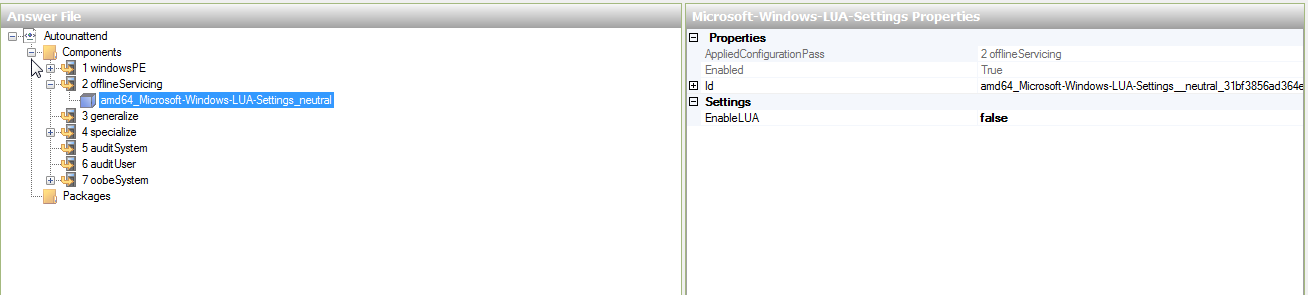
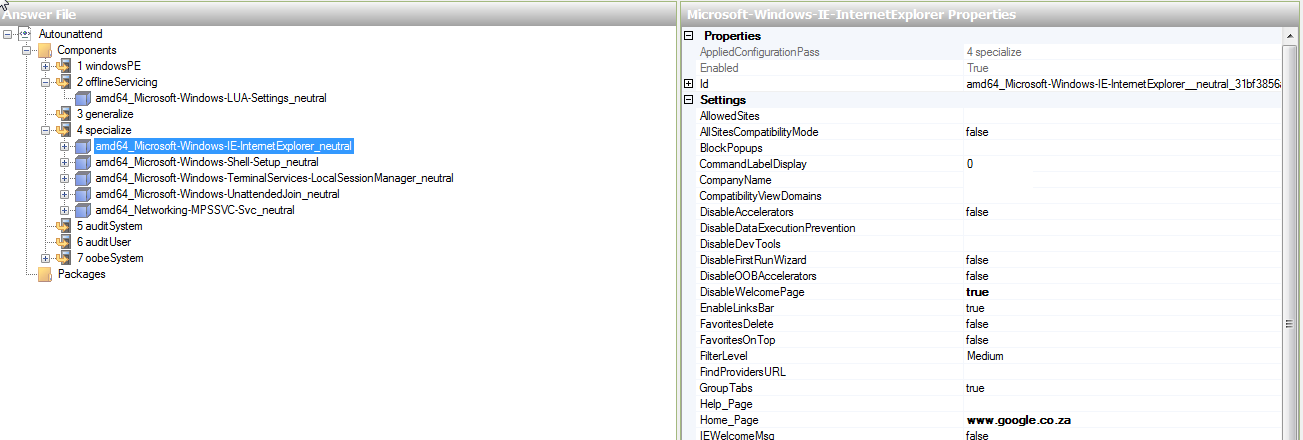
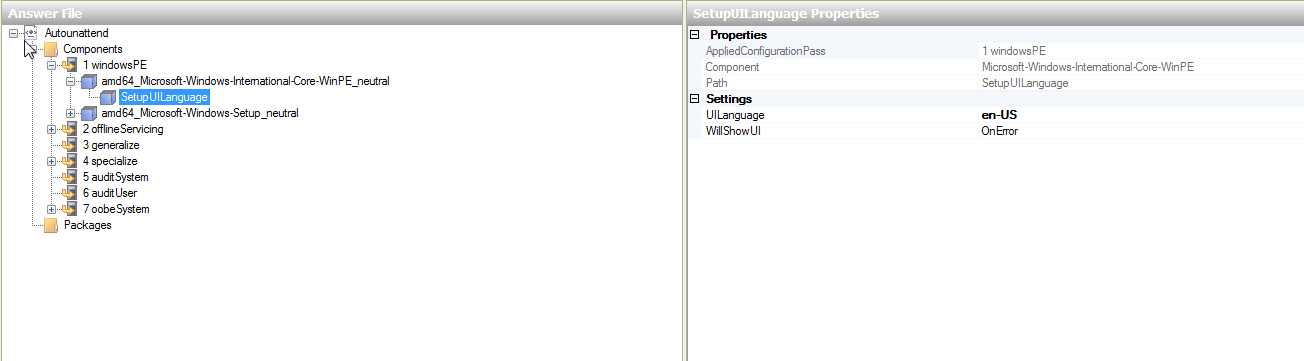
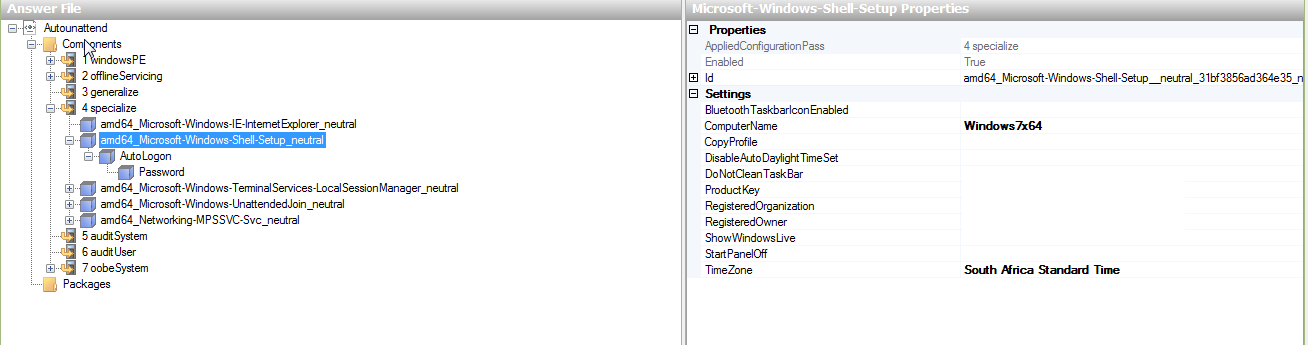
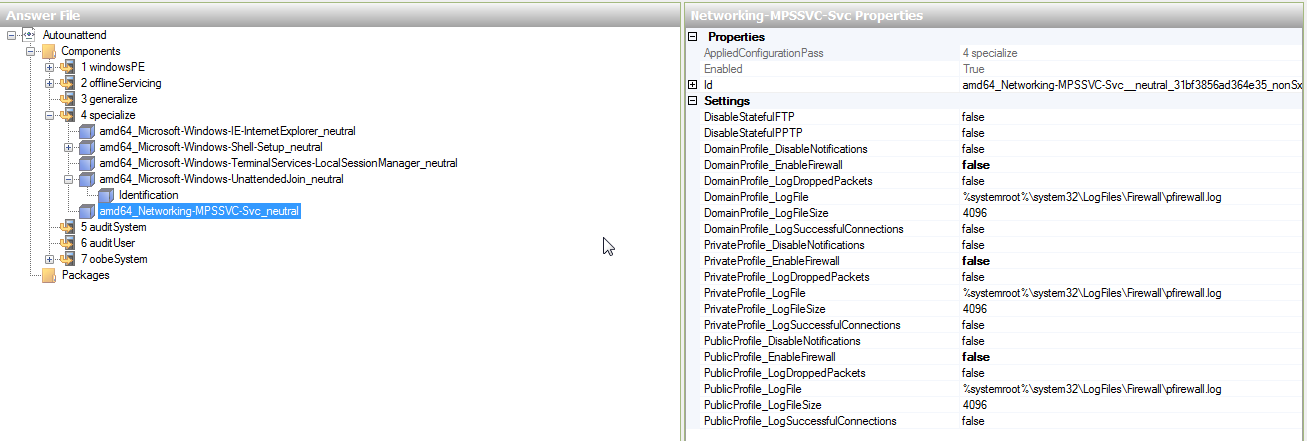
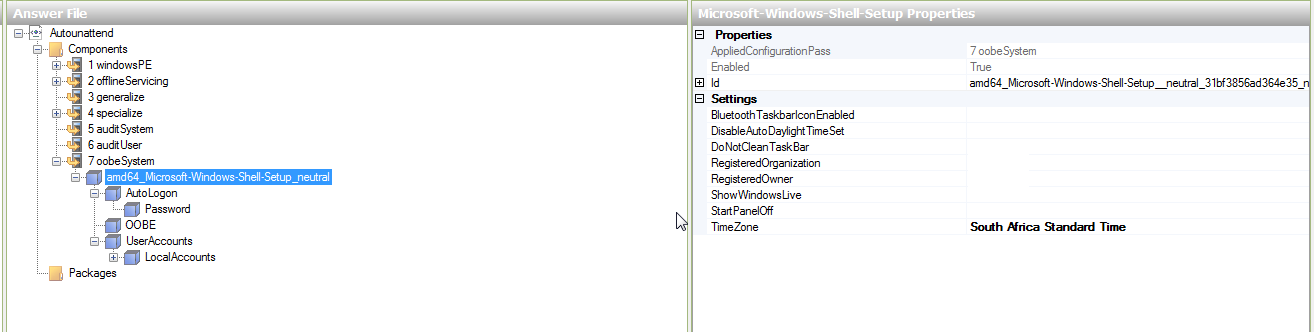
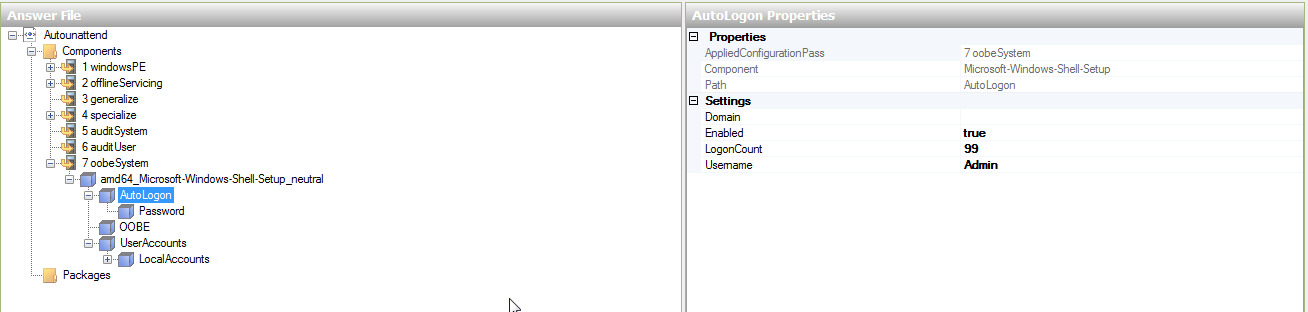
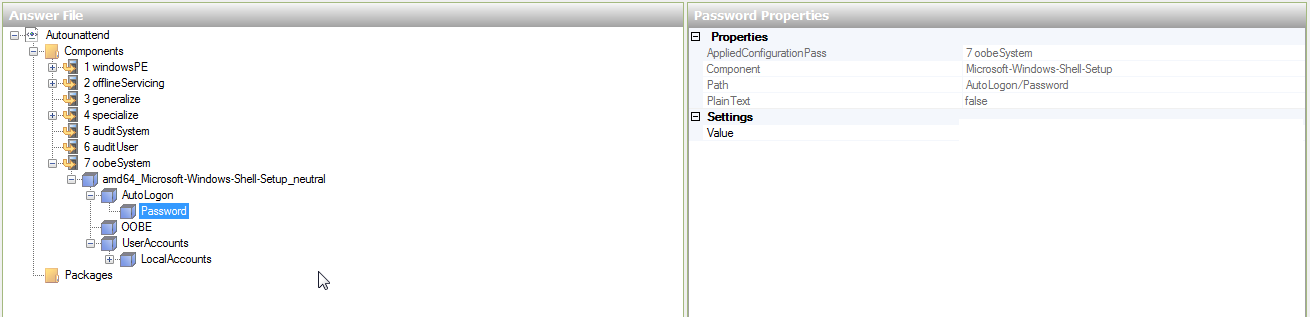
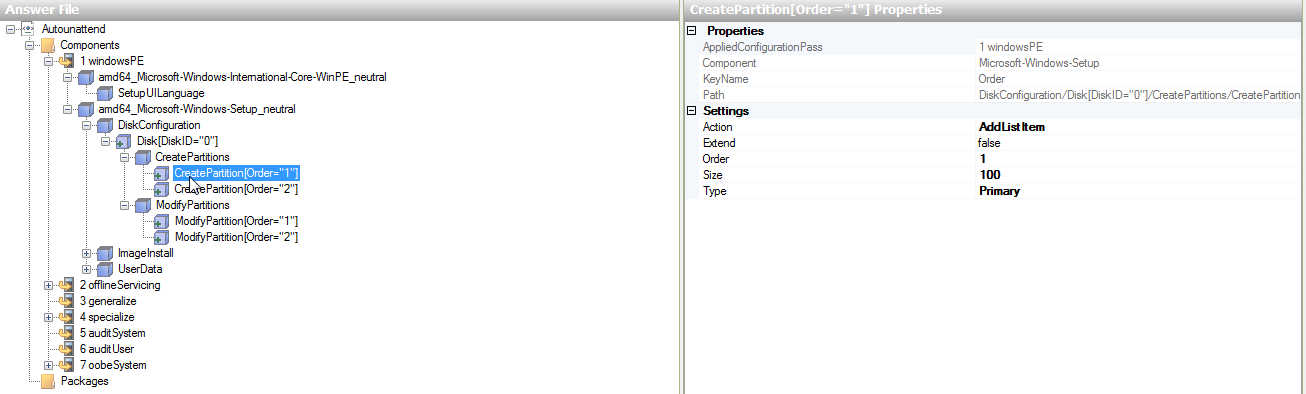
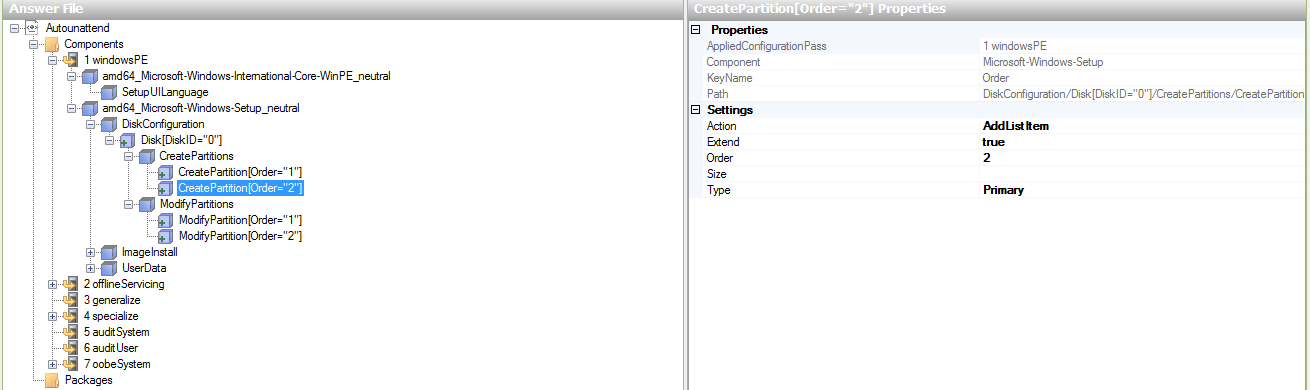
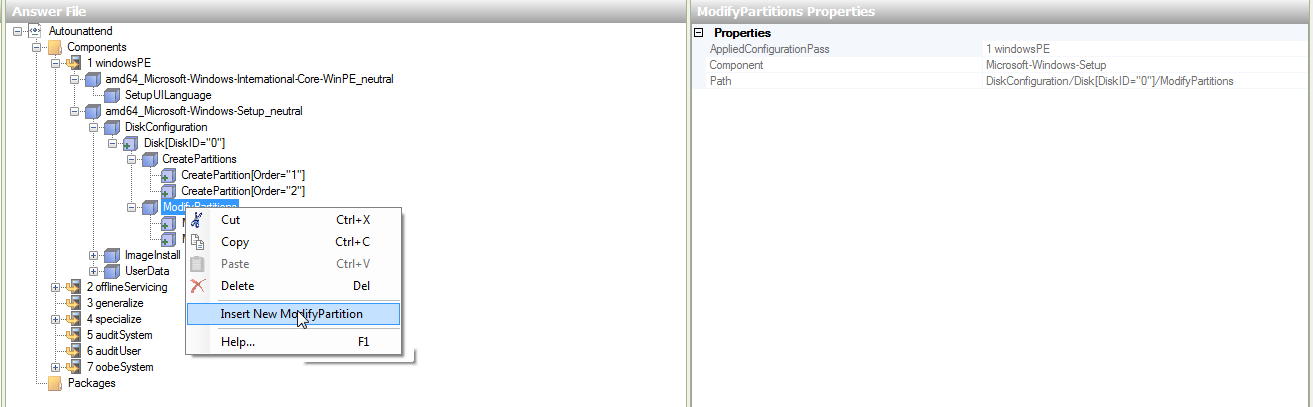
Windows 7 32-bit
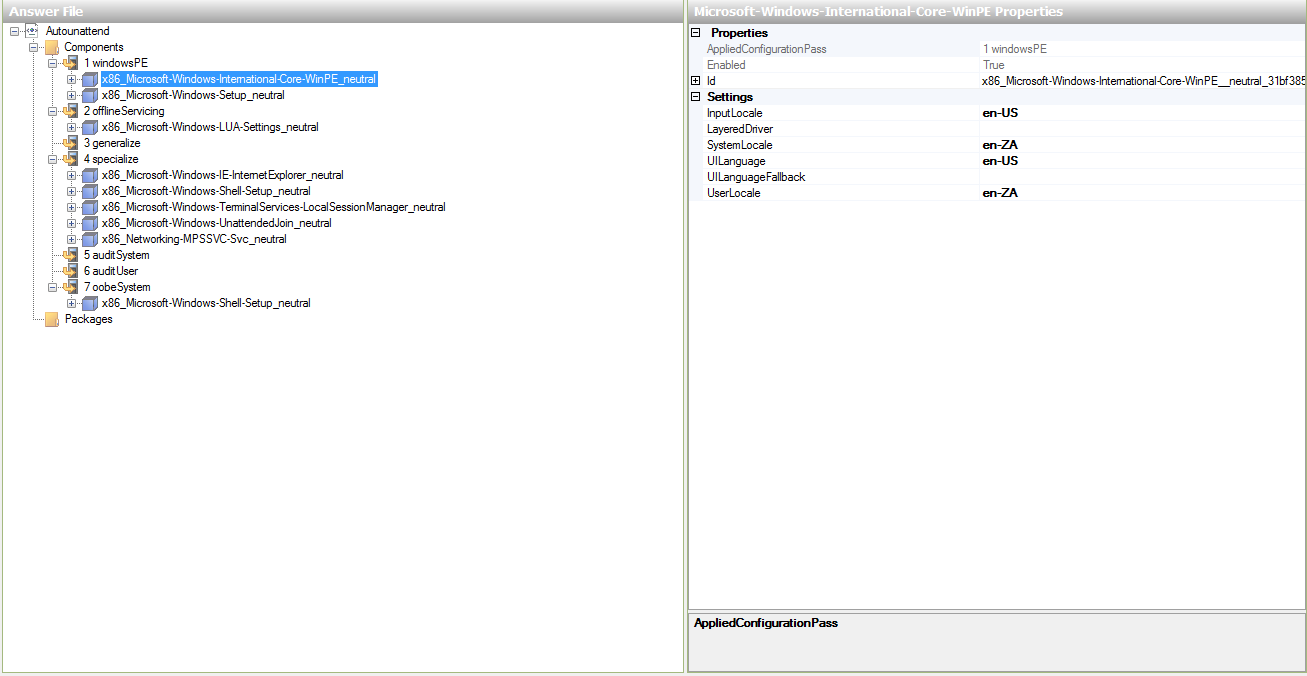
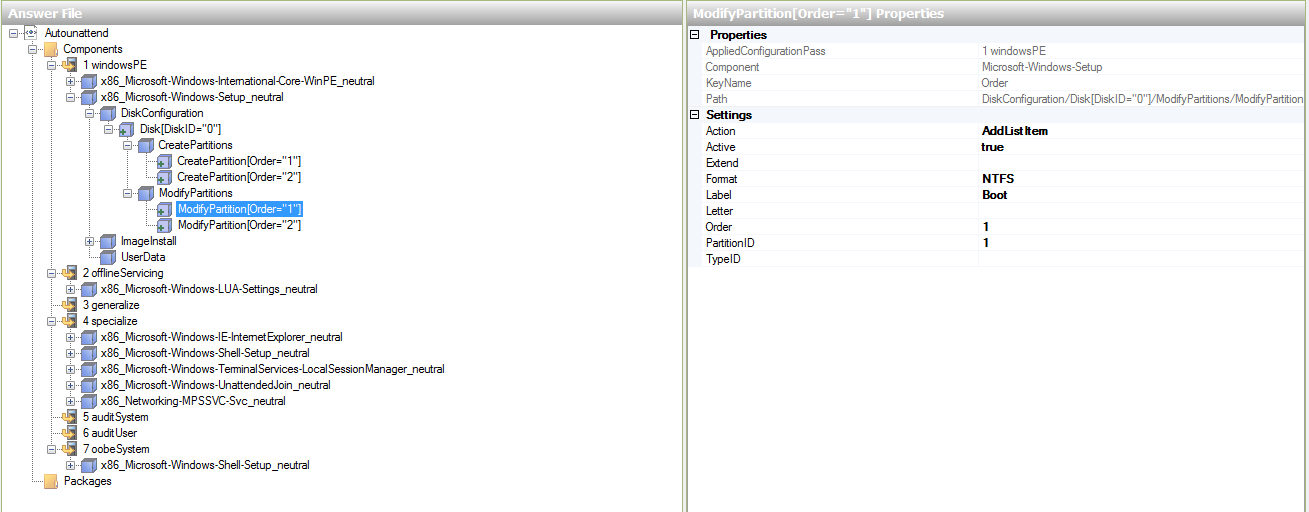
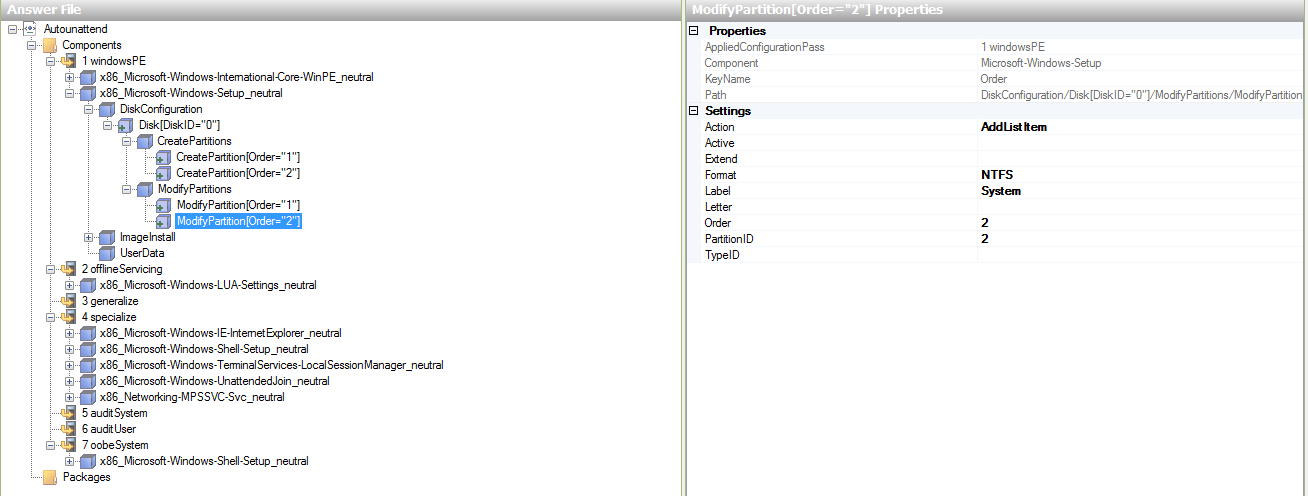
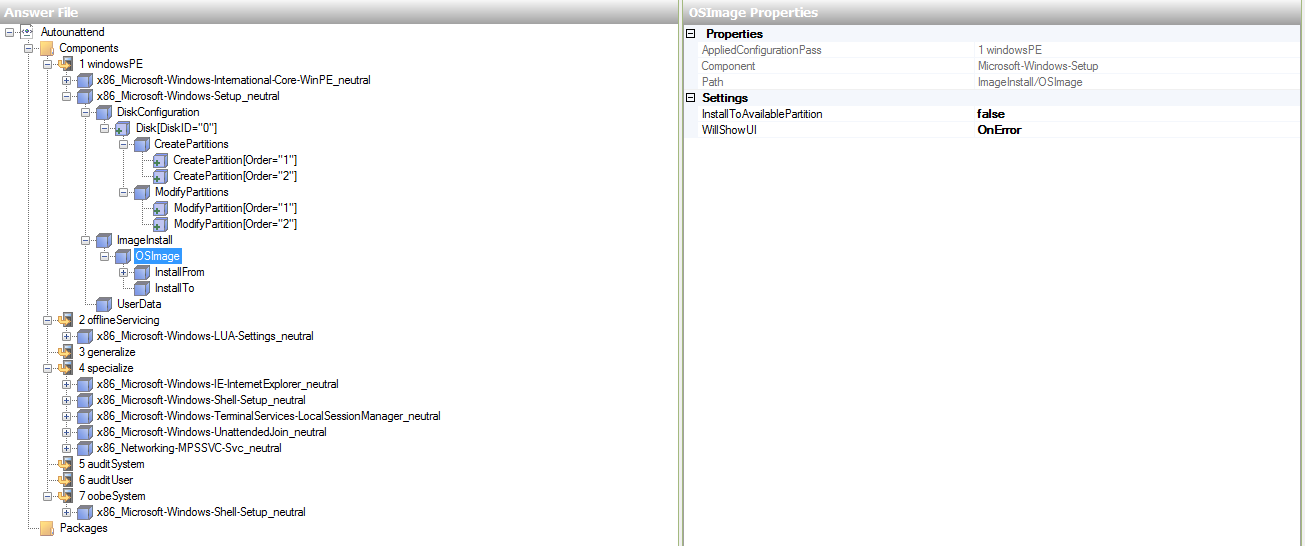
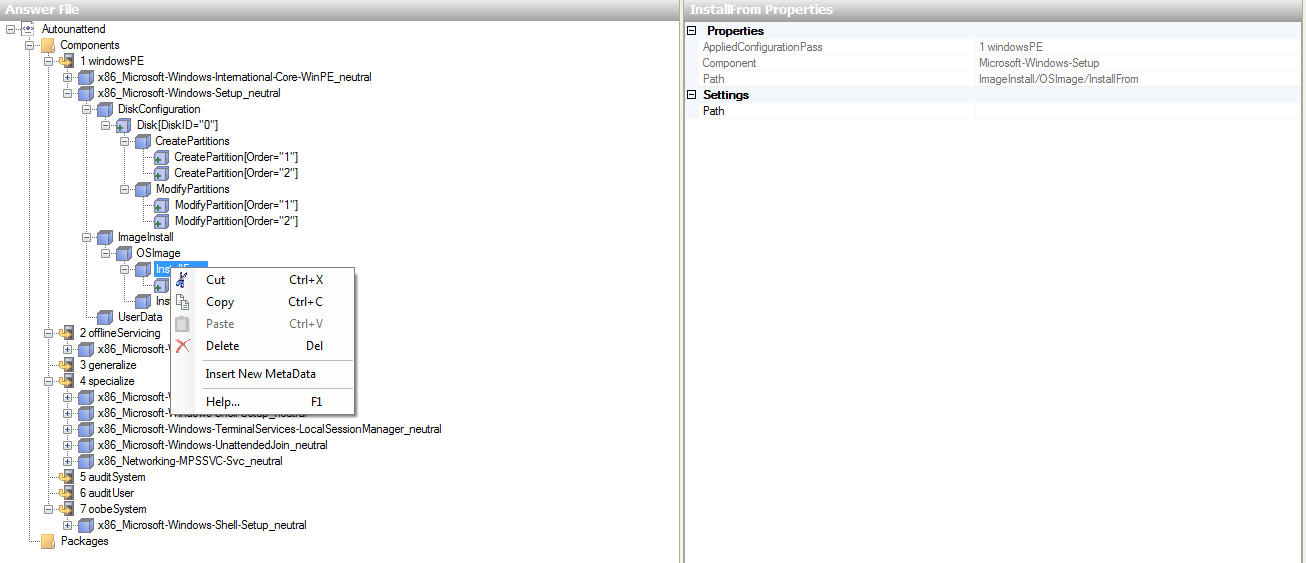
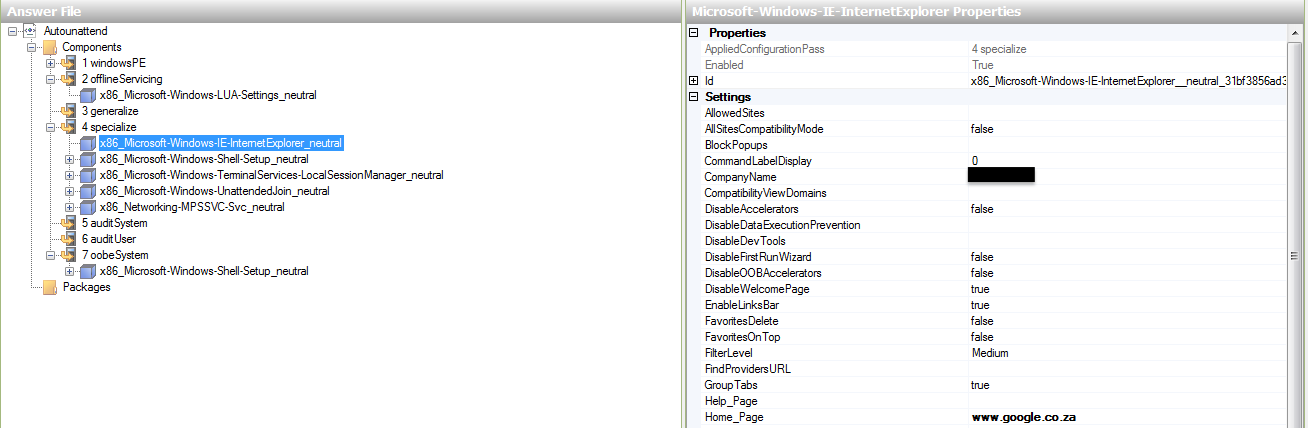
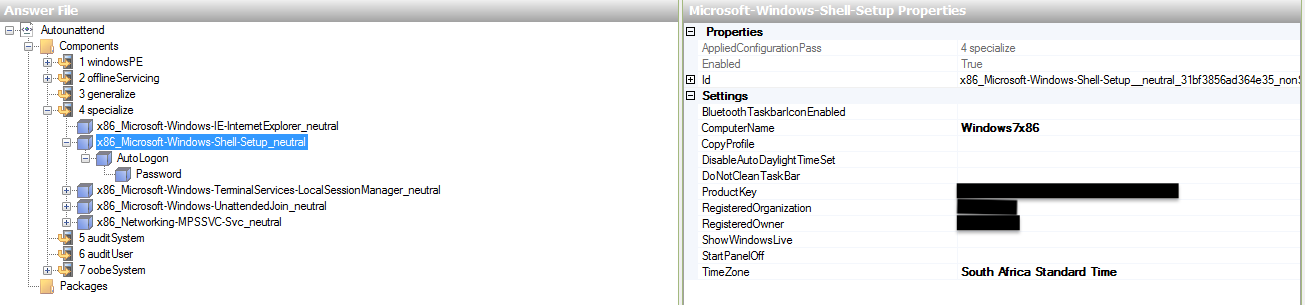
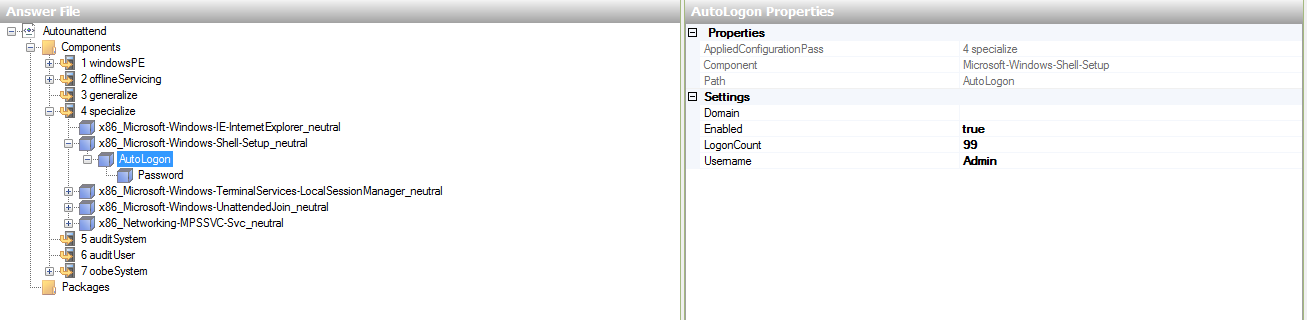
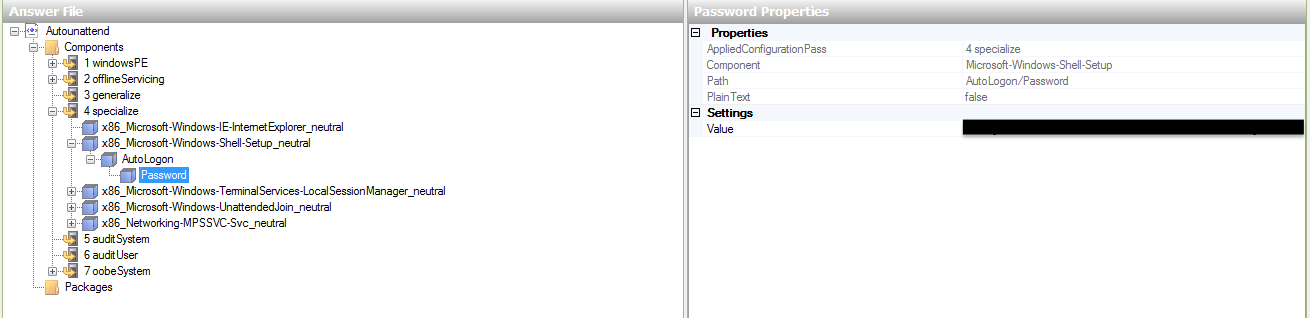
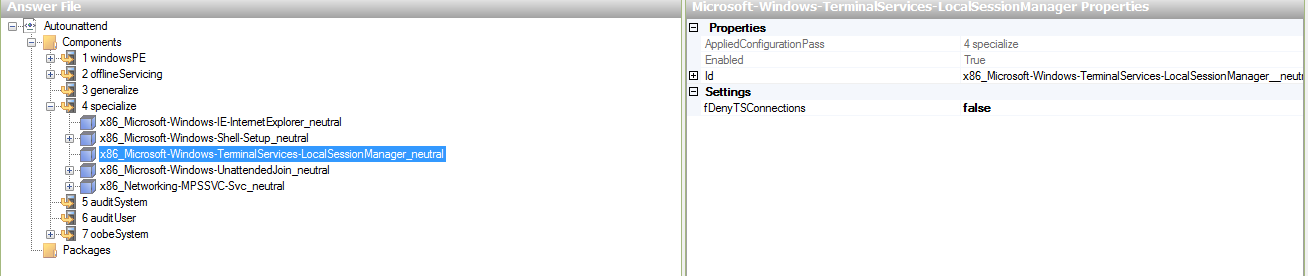
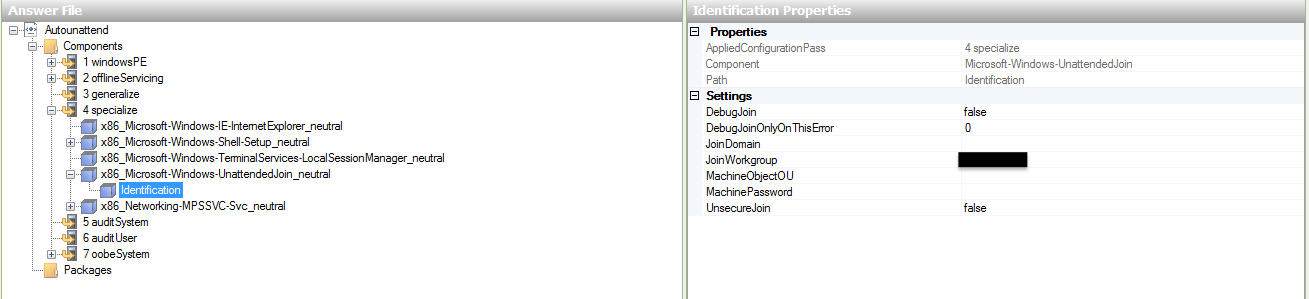
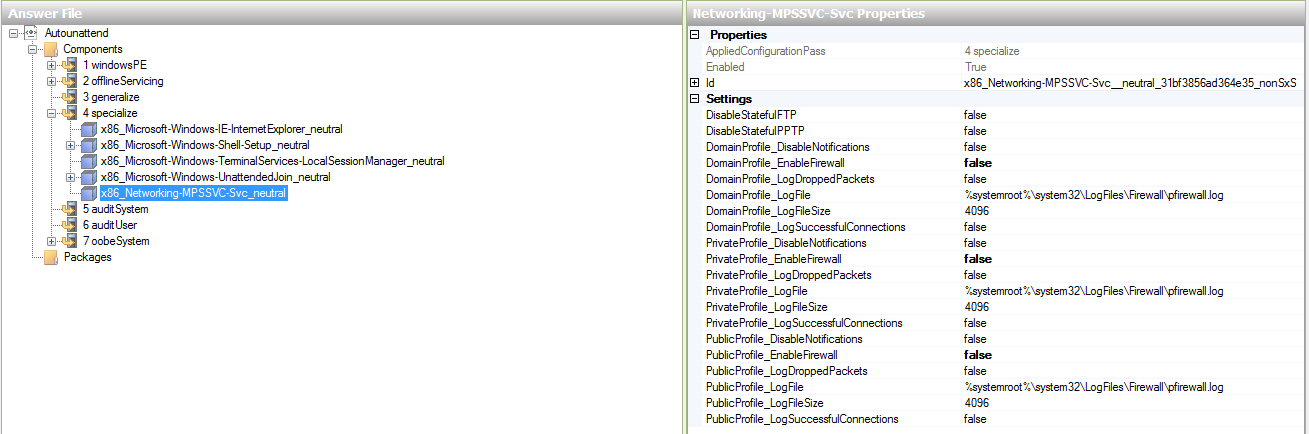
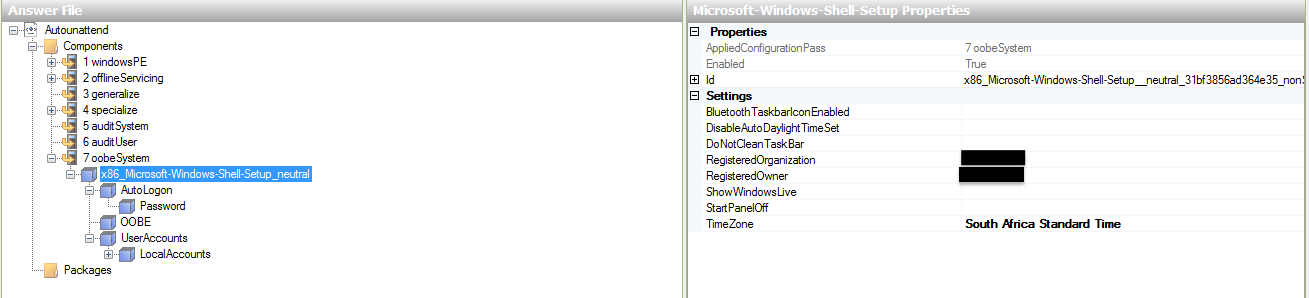
Windows XP
Instructions:
- Download and install nLite
- Copy contents of Windows XP Disk to Harddrive
- Open nLite
- Locate the copied Windows XP files
- Integrate updates and drivers if you want
- At Unattended section
- Fully automated
- Enabled
- XXXXX-XXXXX-XXXXX-XXXXX-XXXXX (please change when activating Windows)
- Automatic
- Turn off Firewall
- Skip OOBE
- Turn off Hibernate
- System Restore Service Enabled
- At Users section
- Add an account
- Username: admin
- Password: 1234567
- Local Group: Administrators
- At Owner and Network ID
- Computer Name: windowsxp
- Workgroup: WORKGROUP
- Full Name: Admin
- Organization: Organization
- At Regional section
- Language: English (South Africa)
- Localization: English (United States)
- Keyboard: US
- Location: South Africa
- Time Zone: (GMT +02{00) Harare, Pretoria
- At Automatic Updates
- Download and notify of installation
- Tweek the disk if you want
- Start the Process and close nLite
- Edit [copied xp location]I386winnt.sif
- under [Unattended] put: "Repartition = "Yes""
- under [Data] put: "AutoPartition = 1"
- Open nLite again and go straight to Bootable ISO
- Make a Bootable ISO with nLite
- Use ImgBurn to write ISO to disk.